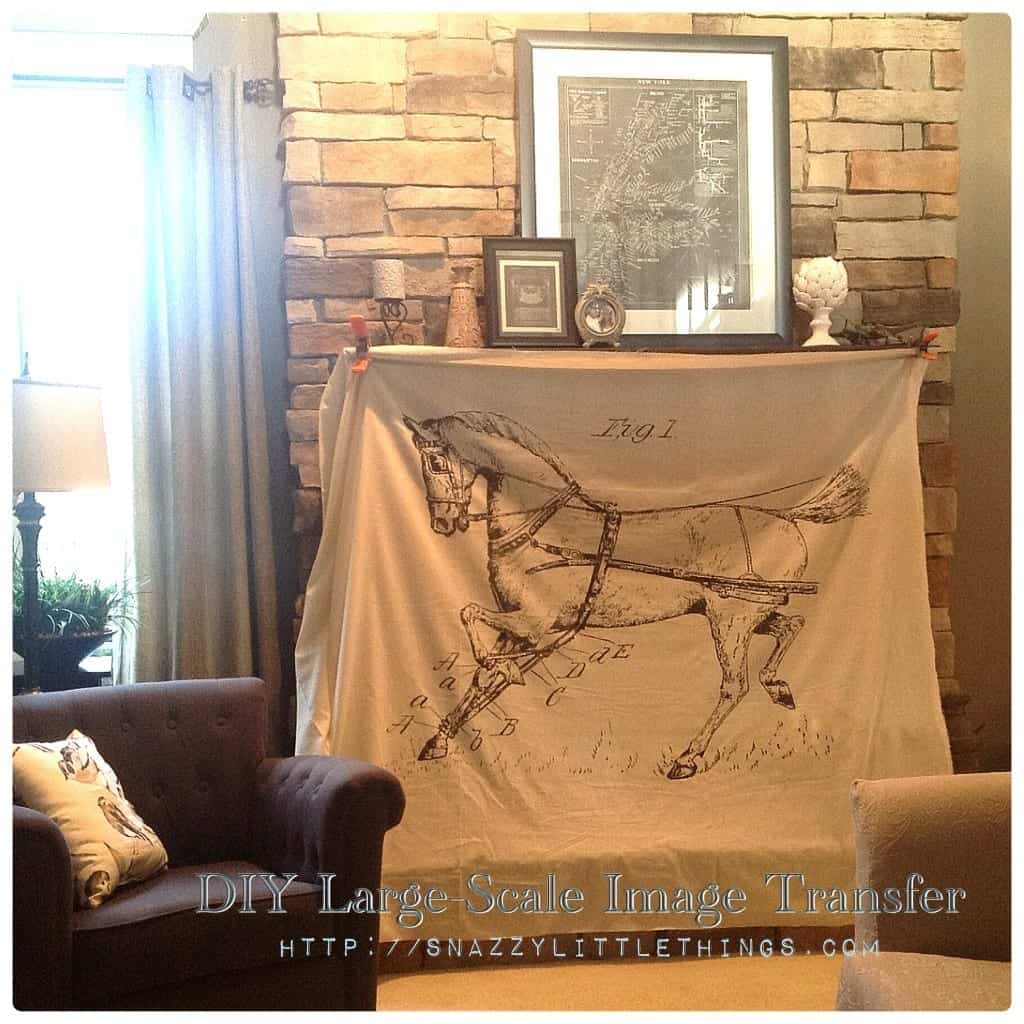
DIY: Large-Scale Image Transfer

I can tell this story best in pictures. If you saw my previous post about image transfers, I was determined to turn a DIY “fail” into a success. My house is in dire need of some larger-scale artwork. But for me, what art you choose for your home is an important decision; it can “anchor” (or detract from) the entire room theme that you’re going for. I love French mixed with industrial decor, and have an open design home with loft ceilings about 20′ high. I love architectural drawings, patent drawings and anything that looks like it came from Restoration Hardware.
Initially, I did think I could pull off this HUGE image transfer (over 60″ x 60″) using the wax paper method on my inkjet printer (don’t laugh) but during my image transfer party with my girlfriends this past Saturday I realized the magnitude of this undertaking. So here is the first photo that explains this journey.
******************************************
Credit:
First, let me introduce you to “12 Easy Transfer Methods” which is a page that I often refer to when I’m doing image transfers. Courtesy of The Graphics Fairy.
*******************************************
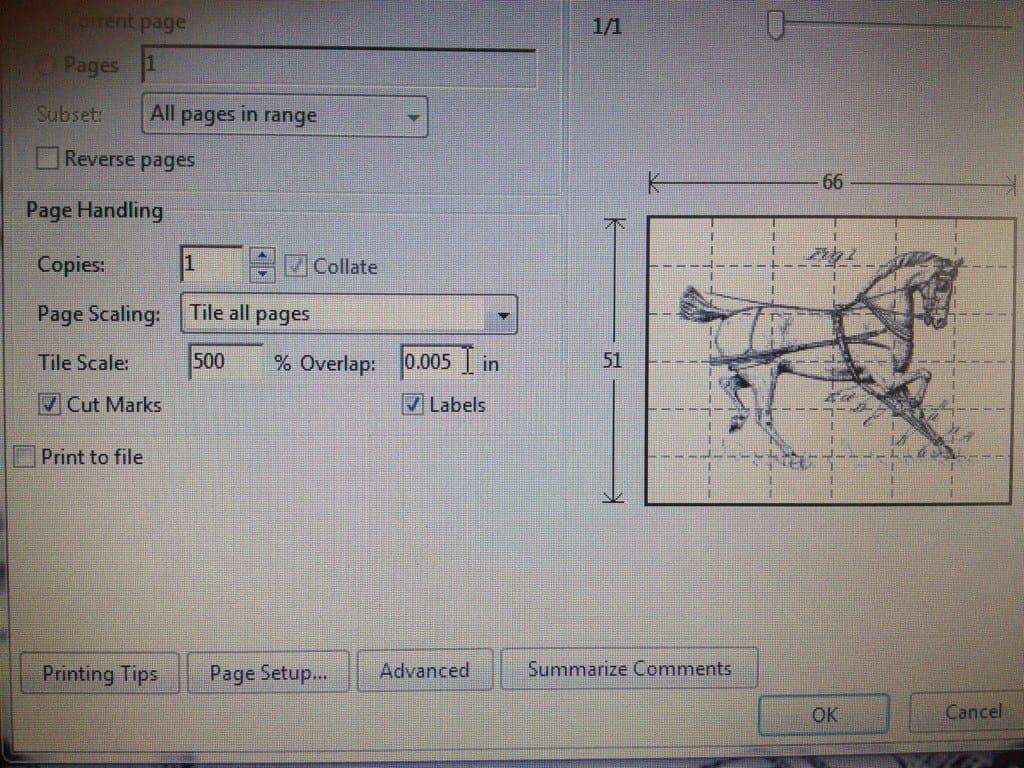
Once upon a time I found an image that I fell in love with, and decided to try an image transfer using waxed paper. First, I tile printed a photo I found online, enlarged the image for printing which resulted in 40 sheets of paper. (Click here for a tutorial on tile printing).
Here they are spread out on my morning room floor….and I thought “maybe I can do this” —because I’m crazy.
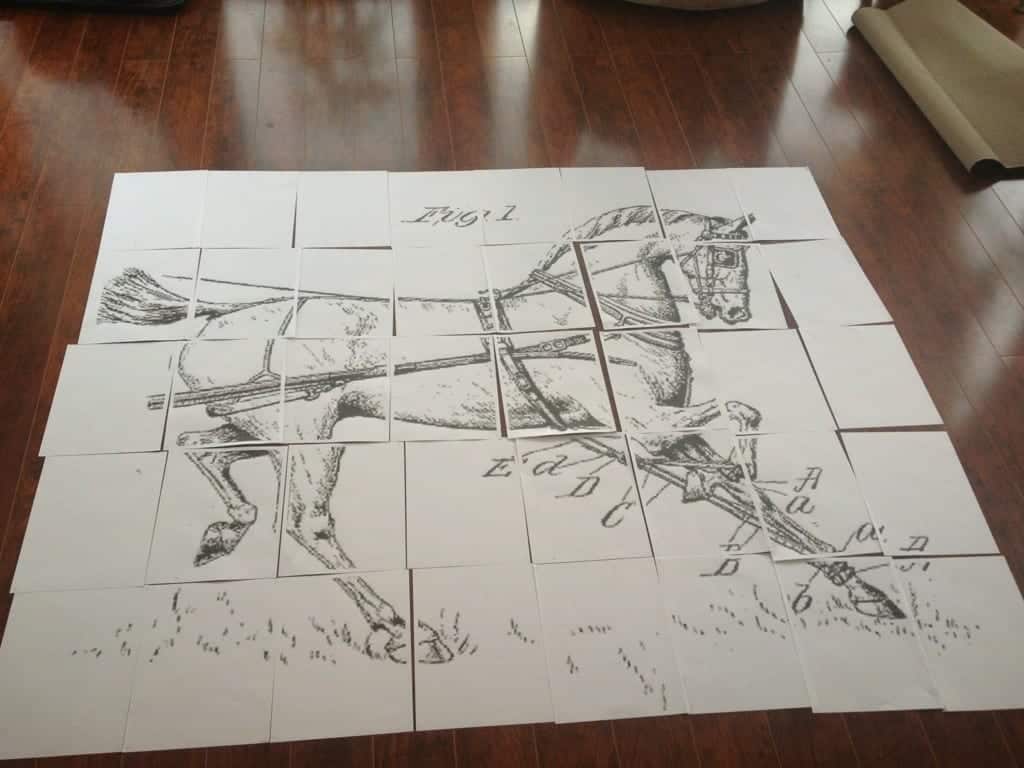
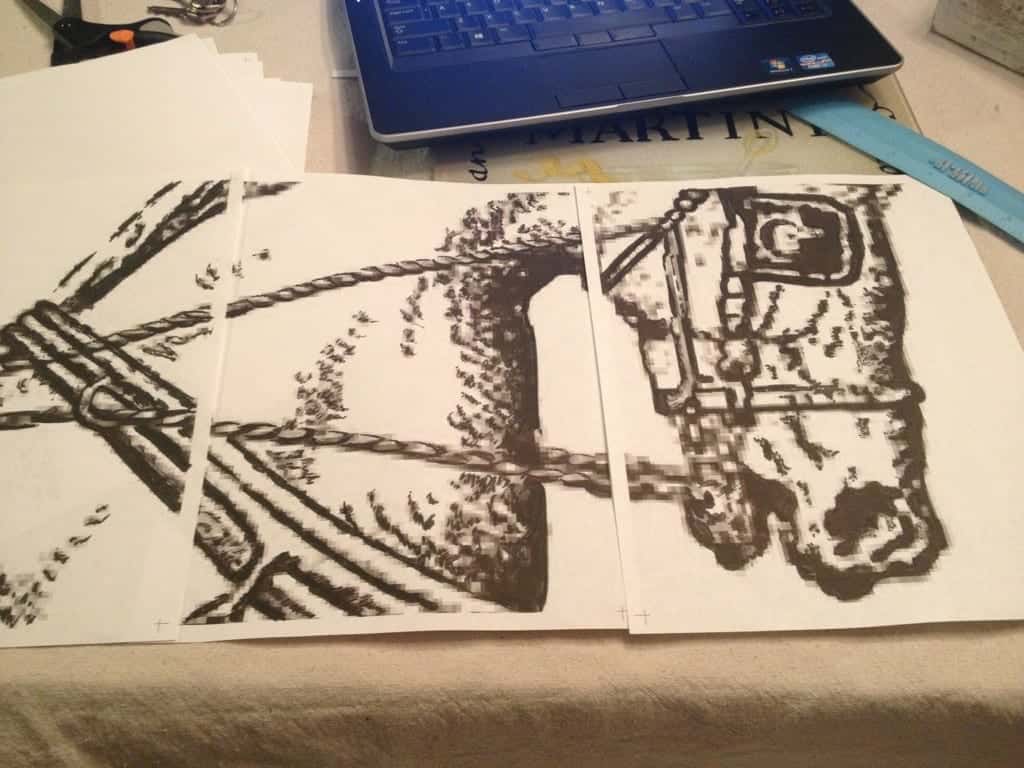
…but the problem, the image was very pixilated, and I got discouraged. Also started to realize that I would have to print each individual page (check)….but then reprint each and every one of these sheets onto waxed paper. Not only that…but I would have to lay them individually, ink-side down…and HOPE they lined up properly. That was going to be the impossible part.
So, I studied the image again, and thought “how can I get this PDF printed so I can use the Citrasolv method of image transfers??” Back to the drawing board for more research…

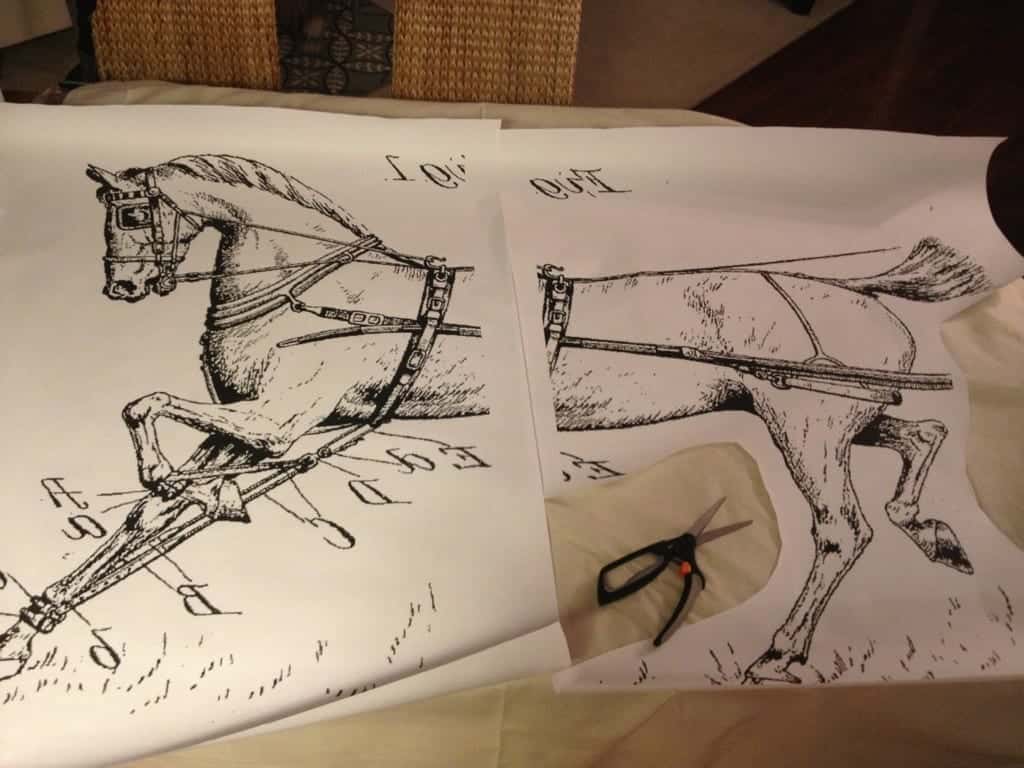
I called the copy store. The girl that worked there gave me false hope. (See, at this point I was still positive). She accepted this image after researching the copyright (it’s more than 95 years old, and it was for personal / home use) so they were cool with providing me with an enlarged 60″ x 55″ image. In supposedly laser print form. (Image is mirrored because with Citrasolv, you lay it face down for the transfer). With me so far?
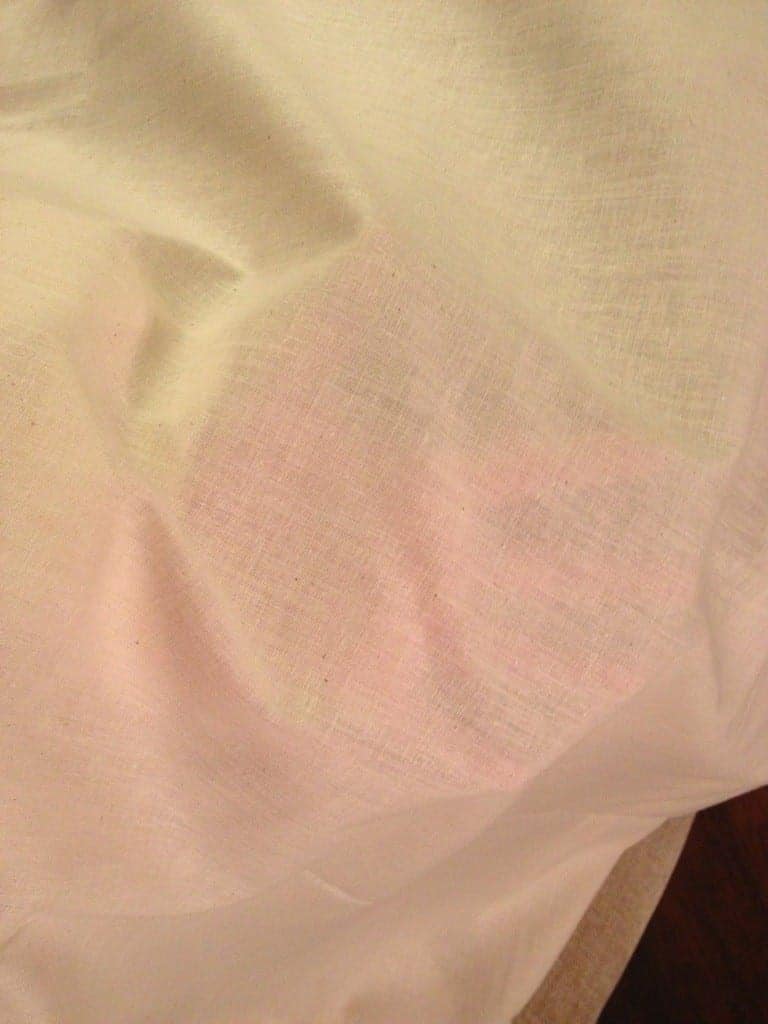
To ensure the image had the best chance at transferring, I purchased thinner material (muslin). You have to rub extremely hard to get an image to transfer to canvas. I don’t mind hard work, but I witnessed (in my image transfer party) that Citrasolv transfers work best on smoother material. You can see how sheer this is…so I thought I was golden.
Citrasolv fully loaded, image strapped down…ready to go…

I burnished for 5 minutes in a small, obscure corner. I got zip, ziltch…nothin’ (I don’t think it was a laser print copy). Off for a glass of wine to think….
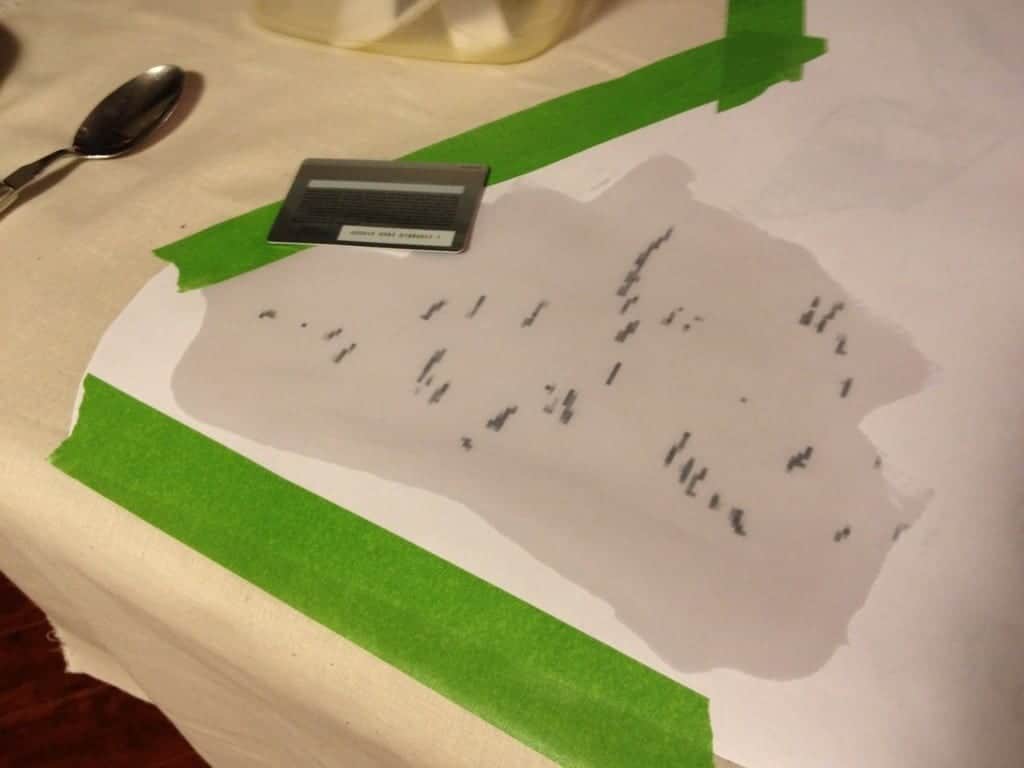
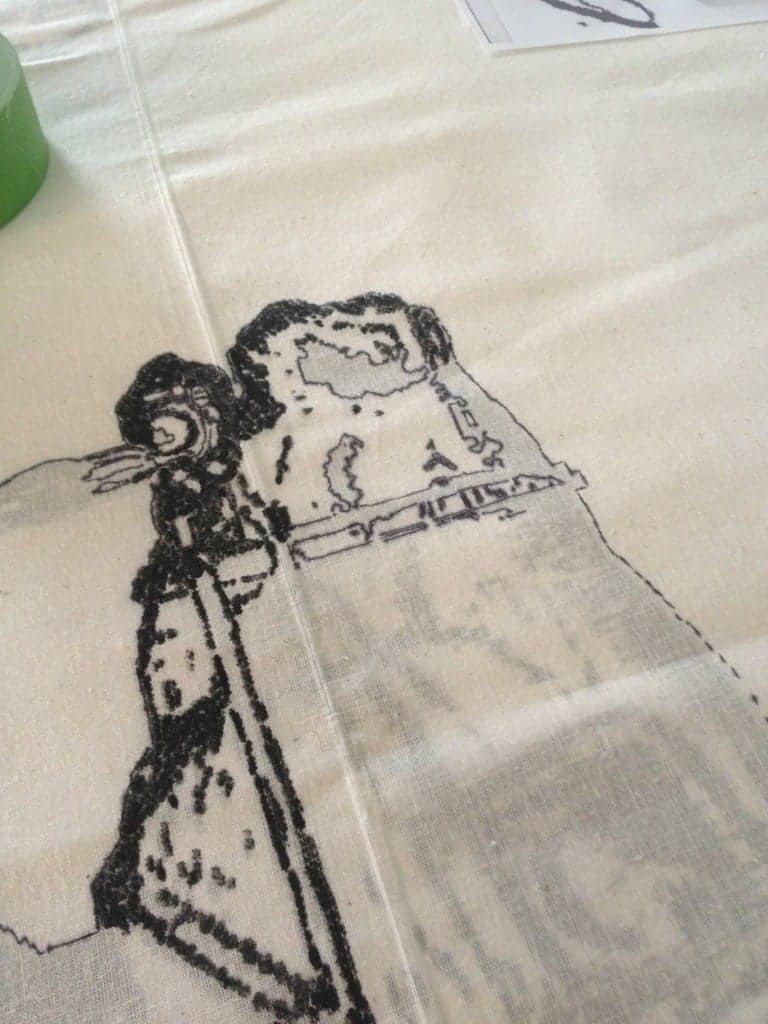
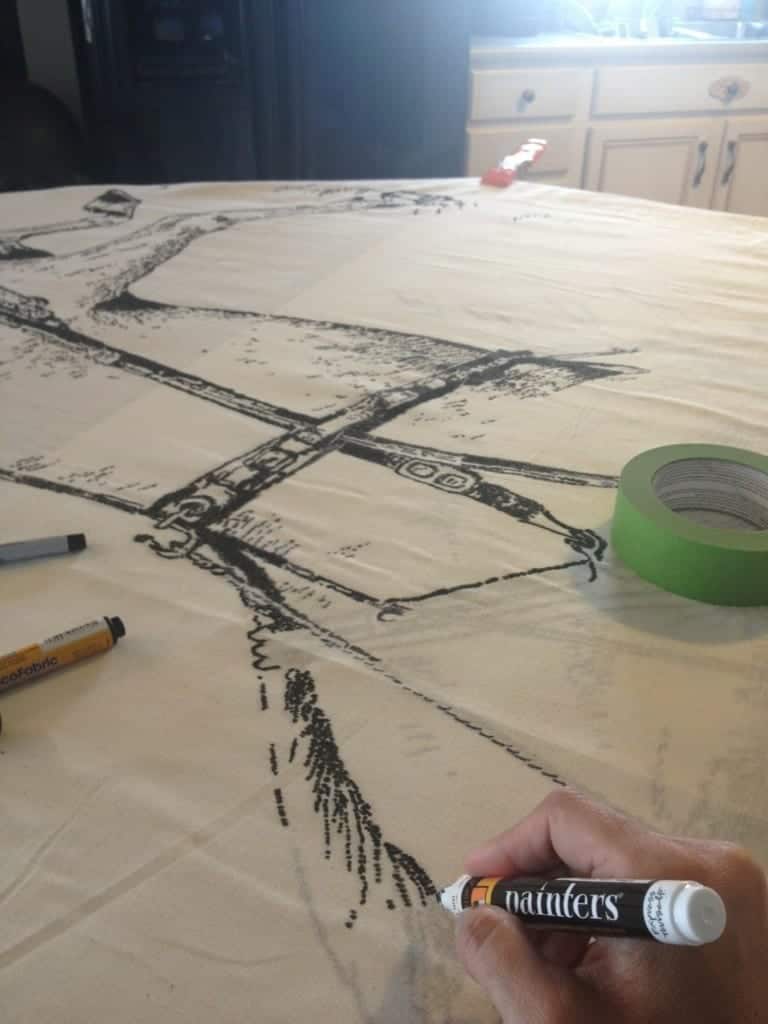
Plan C…flipped the image over, used the muslin. Bought paint pens because I’m crazy. And lots of wine…
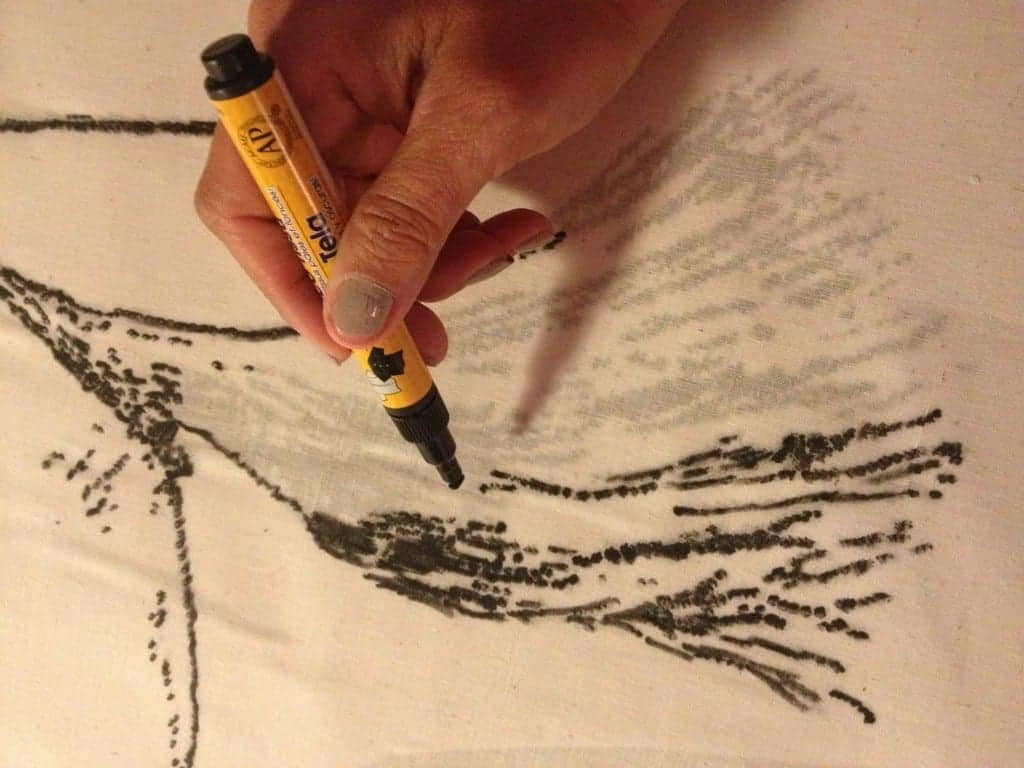
…more progress…
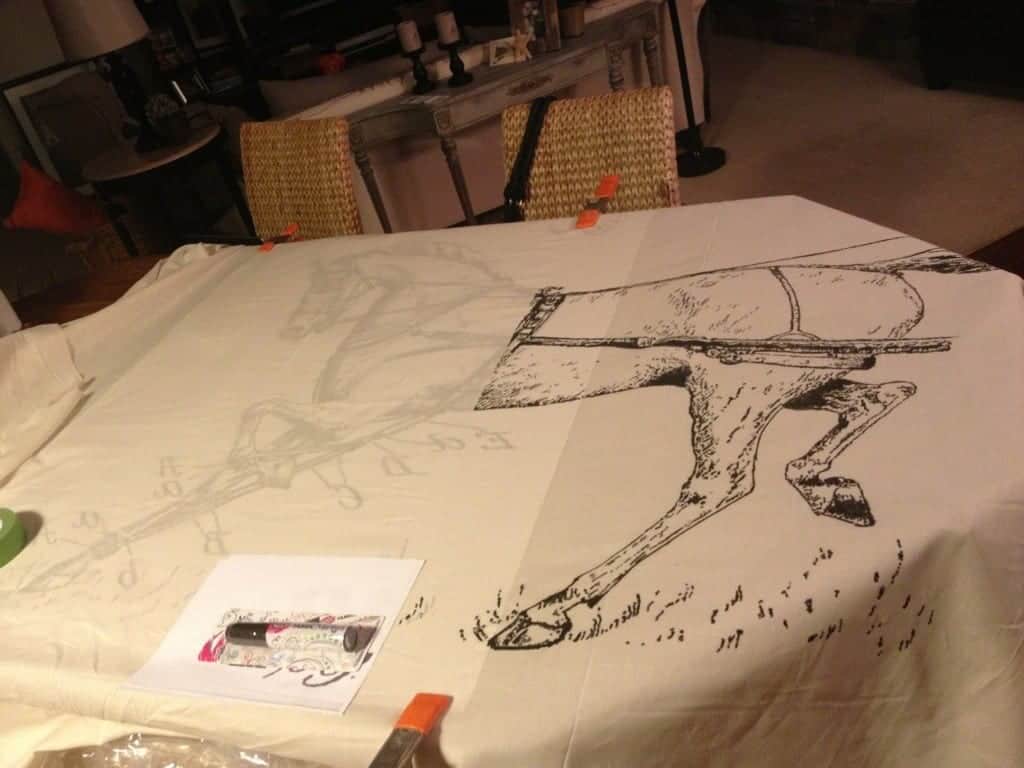
Loving the detail…I would have to flip the lettering back again…but no big deal at this point.
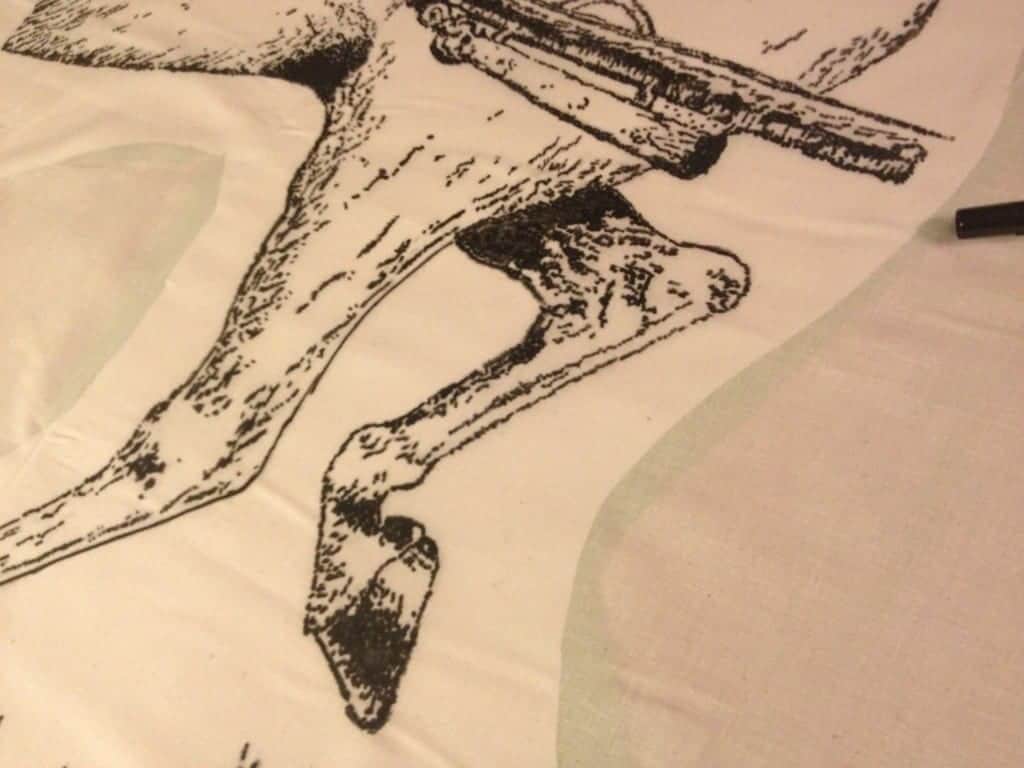
His face…
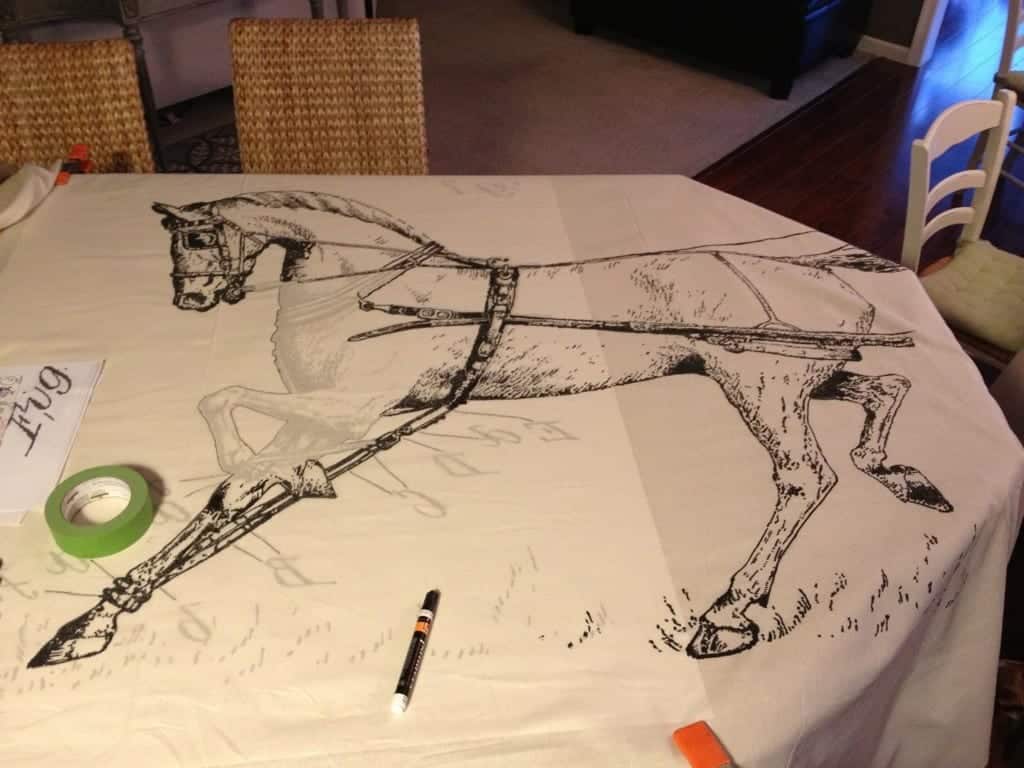
So….I started this on Sunday, and was done Tuesday night.
What you need:
- Large printed image from local copier (they can print in black & white up to 60″ x 60″)
- Thin fabric to lay over the image (I bought natural muslin)
- Tape to secure the image to the fabric (we also used clamps to keep the fabric from slipping off of our island)
- Paint markers (made for fabric) — I basically did this entire image “dotting” the fabric…like an inkjet printer, ironically.
- Wine & lots of encouragement.
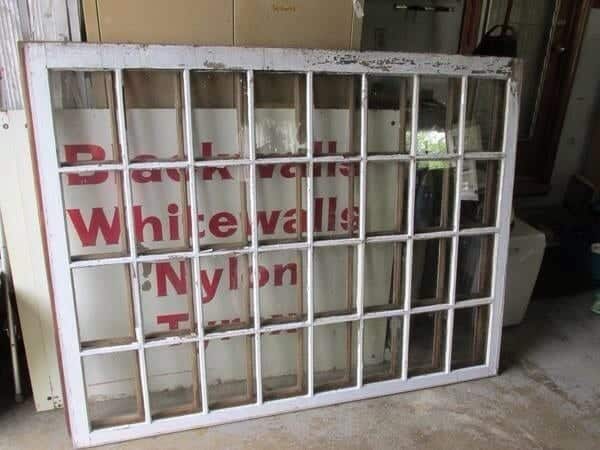
Next…figure out a way to display this as art above my entertainment center behind one of these gorgeous windows…
Thanks for visiting…stay tuned!
This project was shared with:
>
Bless your heart, Jeannette! I’ve had fails that have had me hitting the bottle as well. LOL
It turned out great, and will mean more cause of all the work ;-)
Thanks Denyse…and you’re right I do value it even more now. It was an oddly relaxing project and I could just shut my mind off for the sake of creating. Thanks to that wine :)
Fantastic Jeanette!!! I can’t wait to see it hung.
Enjoy your holiday weekend. After all that work you deserve it!!
Wow! This was quite an undertaking, but what a lovely result!
Jeanette, this is stunning!! You did an incredible job I want one of these so much!
I love your tenacity. I too, have tried every method of image transfer, including silk-screening with my Silhouette stencils (see my Pinterest “Image Transfer” board. Ugh!). I had to do a job for a client, so I went this route. It was actually much cheaper and turned out wonderfully! Check out http://www.spoonflower.com/shop, a site that will print your images, personal artwork, WHATEVER! (I like the recipes on tea towels) on your choice of fabrics. For next time, maybe. But keep up the good work. I appreciate sharing your successes and challenges!
Thank you !! I appreciate the kind words and I will be sure to check out your Pinterest board, and Spoonflower. I adore that site and the concept. Yes DIY is definitely a learning process but I enjoy solving problems and sticking with it. I hope you come back often. :)
I’m so sorry I haven’t replied sooner…but what a month it’s been. That image transfer was going to be the death of me! :) but finally it’s done, but the frame we wanted to put it in…well, it’s not finished unfortunately. So it sits in my laundry room folded on a shelf. I love spoon flower! Thanks so much I hope you’ll stop by often!
Wow I can’t believe all that work you had to do! I had a similar project I was attempting. I wanted a large scale chalk board but with a nautical theme, I quickly got discouraged because I couldn’t find transfer paper. Then tried free hand and hated my lettering so I went to the basement for another time.
Haaaaaa, I LOVED this story!!!! I have been there so many times myself…and have to walk away…to think! You did an amazing job and didn’t give up! Way to go, looks so awesome! Thanks for the tips, I’m going to try some Citra Solve myself, so just seeing what others have done! Looks great!!!