My first project using a Silhouette Cameo
Welcome to my very first Silhouette Cameo project! My sweet husband bought this little gadget a year ago for my birthday and I’ve been dying to try it. Now that I got my feet wet, I’m diving head first into this new adventure of crafting.
This could be dangerous, people! While I love using it, I’m an old dog in a lot of ways and not super quick on the uptake when learning a new skill that requires precision (like when I tried using a sewing machine). Thankfully there are so many great tutorials online, like these on Youtube. I learn best by seeing videos of a multi-step process before I tackle it myself.
Once I get a handle on this machine I can’t wait to share more projects. The primary reason I wanted a Silhouette was to create my own stencil designs and to create heat transfers onto pillows. But my mind has been blown as to how much more a Silhouette can do. If any of these projects appeal to you, I highly suggest you buy a Silhouette (or put it on your wish list). But be patient and give yourself a day to learn it.
Silhouette Cameo Rustic Sign Tutorial

- A Silhouette Cameo
- Install the Silhouette software onto your machine
- Silhouette Adhesive Stencil Material (no cutting mat is needed for this project)
- Transfer paper (this is the kind we used, it’s cheaper)
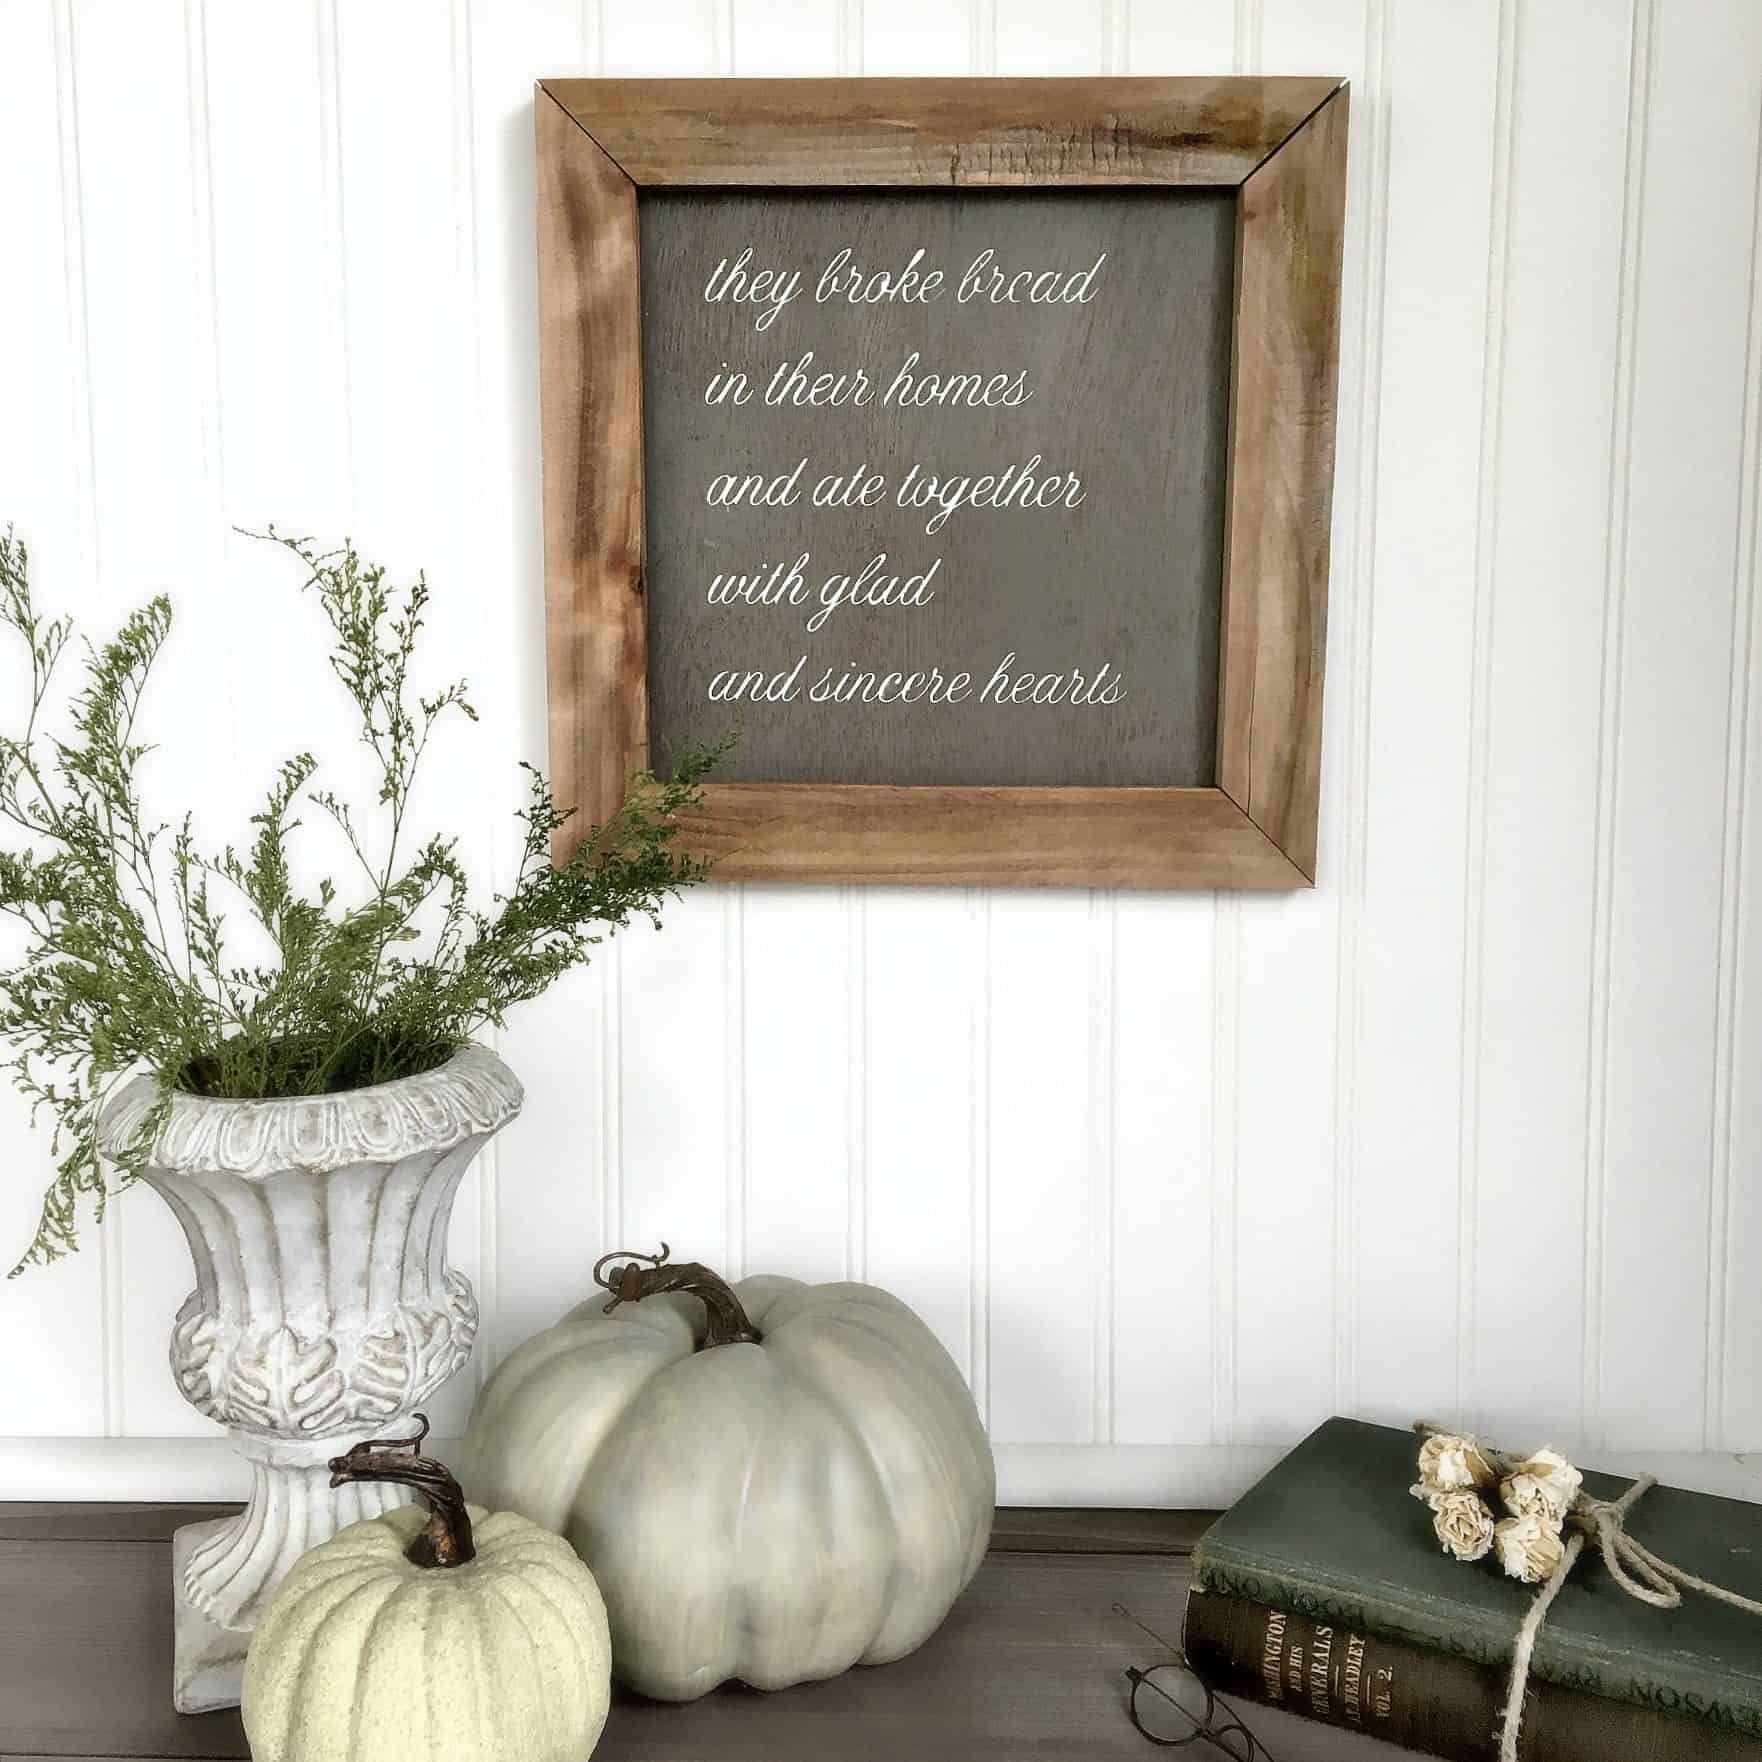
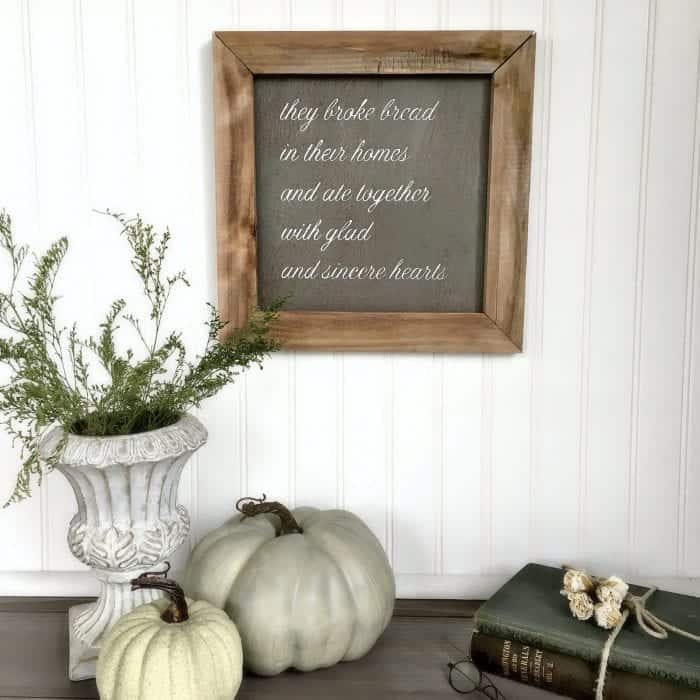
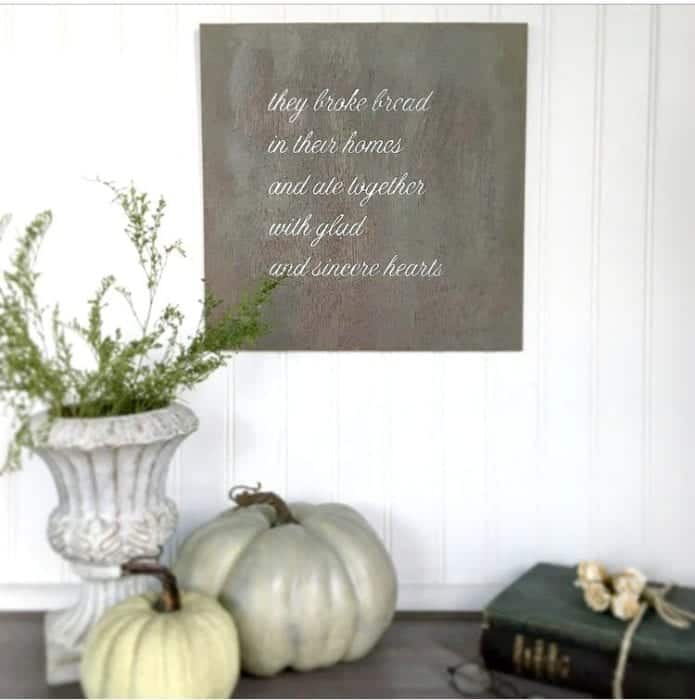
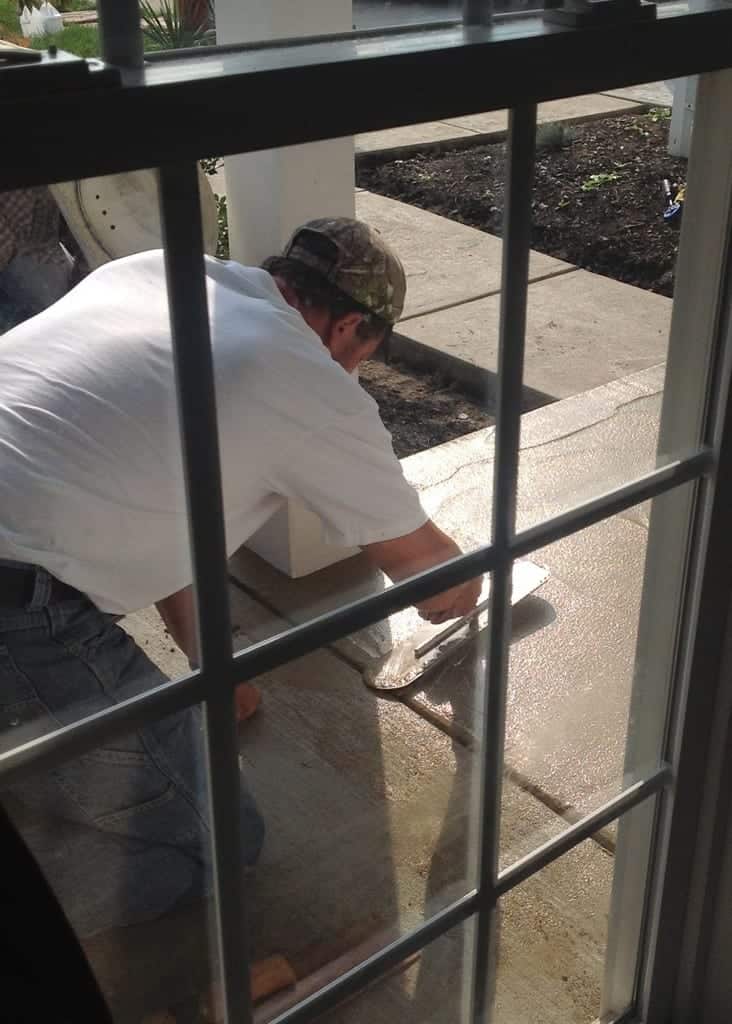
- A piece of 12″ x 12″ plywood create your art — which means your design area is around 9″ x 9″
Pin it for later:

Set up your page
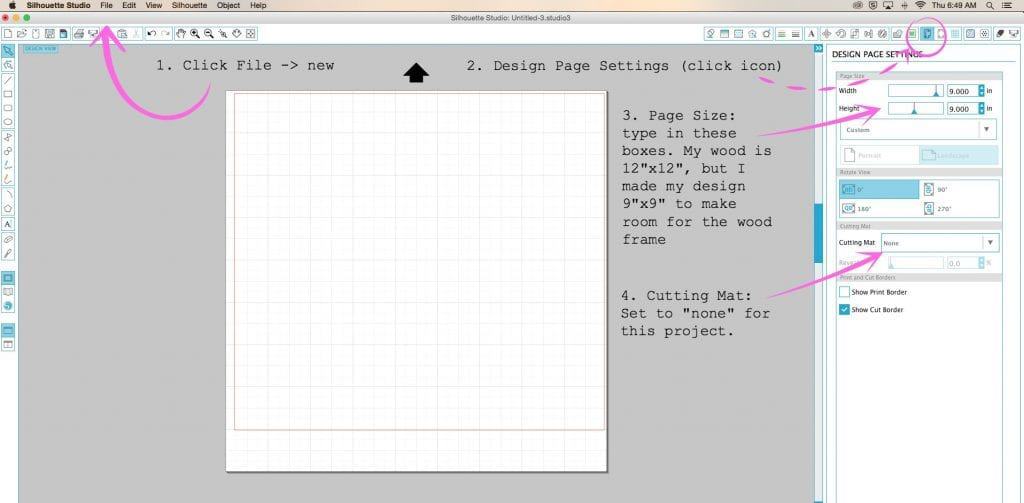
Open the Silhouette software on your computer. Then follow these steps to set up your page
- Click File -> New
- Click Design Page Settings (see image for icon)
- Set Your Page Size: type your size in the boxes as shown.
- My wood is 12″ x 12″ but I made my design 9″ x 9″ to make room for the wood frame that I will glue and tack on later
- Cutting Mat: Set to “None” for this project.
Designing Your Art in the Software:
Now I’m going to be very non-technical here and just say…experiment! You really can’t mess up thanks to the “undo” button found under Edit -> Undo. By clicking “undo” any mistake I made instantly disappeared. Other than that, designing is really simple. I clicked the text box and started typing. Then I played around with the lettering until I liked it. I clicked “undo” if I did something I didn’t like. I took a video of me tinkering a bit with some notes on what I was clicking until I got it just right which I’ll share in an updated post. Tinkering is what brought me this far.
Here are some tips when designing your sign:
- When you want to resize your entire text, triple click and it will highlight green.
- I experimented with different fonts until I got the look that I wanted
- Right clicking and “welding” my words made them look more cohesive – but I waited until the design was finished.
Set up the “Cut Settings” for this design:
Here is where you’ll find the “Cut Settings” button:

For this design…
- Cut Mode = “Standard”
- Material Type = “Silhouette Stencil”
- Adjust the blade to a cut depth to “4”
- Adjust the speed to 2 cm/s
- Thickness 33
- Line Segment Overcut = Off
- Test cut (if you want to!) — this is a great feature to make sure it cuts correctly
- Send to origin
On the Silhouette:
Now it starts gettin’ real and it may get confusing.
- Adjusting the slide rollers – which sounds very simple except I needed a college class on just this portion alone! I love how easy Silhouette makes it look…but I was not nearly as calm. Getting the rollers in the right place is very important because if your rollers aren’t lined up your stencil will slide and it will cut crookedly. (Spoken from experience)
- Click “Send to Silhouette”
- Pray. Hard.
- Swear if necessary.
- Pray. Again.
Using Transfer Paper on top of the Stencil:
Here is a must watch video of a girl that explains this next step. I love that she’s completely honest about it…but while watching her, I could relate to her struggle. Mark seemed completely clear on this. Me? Not so much.
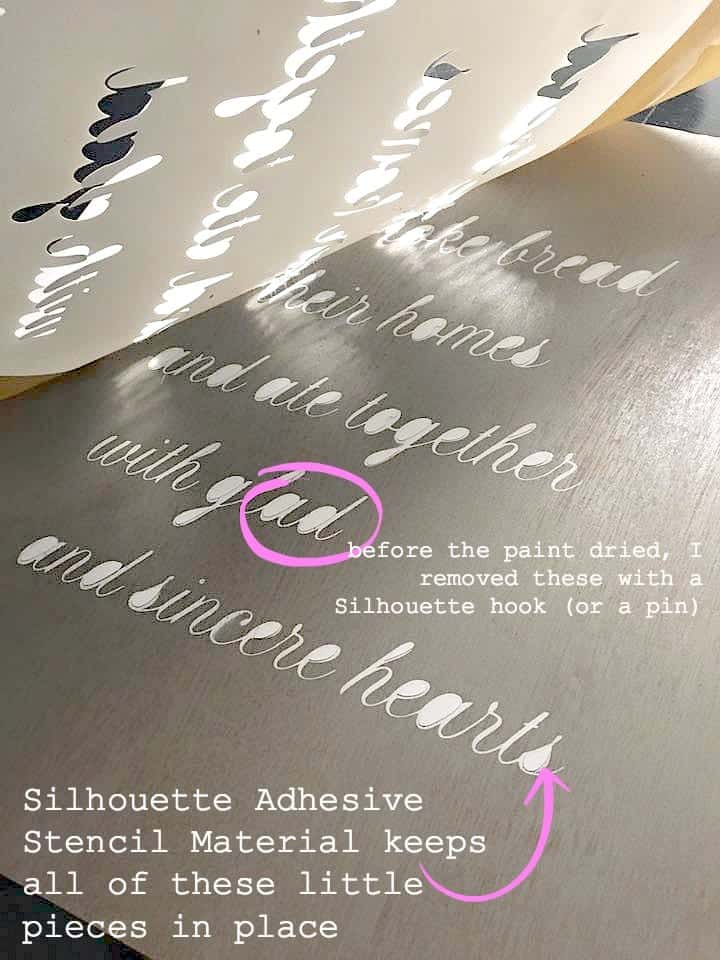
- Create a usable stencil by weeding the excess pieces using a Silhouette hook.
- Once finished weeding, place the legible side of the design face up, adhesive side on the bottom.
- Apply transfer paper adhesive on top of your design (yes, you’re covering up your pretty design). I was so confused at this point so I rewatched the video.
- The transfer paper will be what holds your little “pieces” in place on your wood.
- Line up your design onto your wood, carefully remove the adhesive layer on the underside of your stencil (it’s the layer underneath)
- Then, remove the top transfer paper, making sure the little pieces remain in place.
The layers:
________________<— top layer is transfer paper, adhesive side down. (Remove this 2nd)
________________<– actual stencil, design facing up so it’s legible. (Remove 3rd after painting)
________________<– adhesive portion of stencil paper. (Remove this 1st)
Questions I had & the answers
These are the questions that ran through my mind as I was using my new “toy”.
Why use Silhouette Adhesive Back Stencil Material?
To keep a tighter adhesion to the wood. For this project, the end result is a hand painted appearance, and the font is very intricate, some parts (like the center of the “o” are unattached). Those little floating “o’s” are what makes this more complex. In fact, there are a lot of little “floating” stencils that are unattached like a traditional stencil. That’s why we use transfer paper on top to lock those in place.
What is the point of the transfer paper on top of the stencil?
The transfer also helps to lock all of the floating “o’s” in place once your stencil is placed on the wood. The transfer paper holds the design down while you peel the underside adhesive off of your stencil. If you rewatch this video (you may need to do this several times) you’ll start to understand what I mean.
Why didn’t I use a pouncer for the lettering?
The lettering on this particular stencil was very thin and fine. Bleeding under the stencil would have been more likely with a pouncer because I would have had to press harder to the paint to show up on the wood. I suggest spray paint for smaller, finer cuts and less bleed – but it’s a judgement call on your part in the end.
Whew!
My goal is to provide you with the videos to make it easier to understand. But as of right now, I’m just happy to have triumphed. Once I find the words to simplify this…I will write a new post or video to explain it all.
Are you a Silhouette user? I feel like this is a whole new world for me, and I’m pretty excited to share what I’ve learned.


Thanks for sharing. I like to learn new things except I don’t like to get confused! I look forward to seeing what you make. I could have quotes all over my house.
Thanks for the honest review. I have a Silhouette also & like you was very confused about how to use it. I will say that the more you use the easier it gets😉 I haven’t tried to make a stencil yet but am in the process of making one for fall. Thanks for your tips & the links.
Oh my goodness, I had no idea … what I thought I was going to find on this post was something you made with a cameo, silhouette, painted on something!!! 😂 This machine is amazing, not sure if I’d have the time to do all that!! Every day I learn something new lol!! Thanks for your great Blog, and for sharing all your super ideas!!
Thanks Darlene! I couldn’t find an easier way to describe this process. Maybe video will help make it simpler. But I do love the kind of projects I can create using a Silhouette. It might become addicting! 😂
Great post! Pinning so I don’t lose it. I have post it notes all over my Silhouette Cameo because it is headache inducing every time I try. I don’t know why it is so hard to get the hang of it, but for me it has been really hard. When it works, it works great, but I have wasted a lot of material getting there. Hopefully with your tips it will go much smoother!
Thanks Karen! I just discovered contact paper which will be coming in a new post. I am in SUCH a learning curve right now :)
Fantastic post! I love what you created here, and hope I will be able to create this. Yours looks amazing. Thanks for sharing.