DIY Dog Crate Table
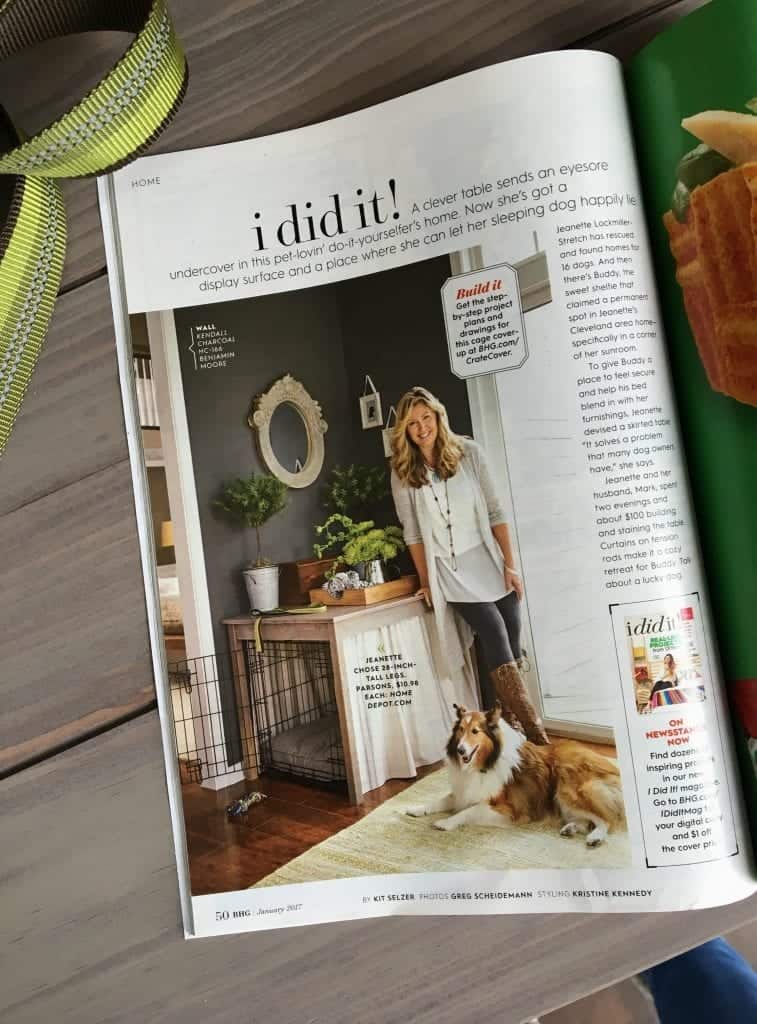
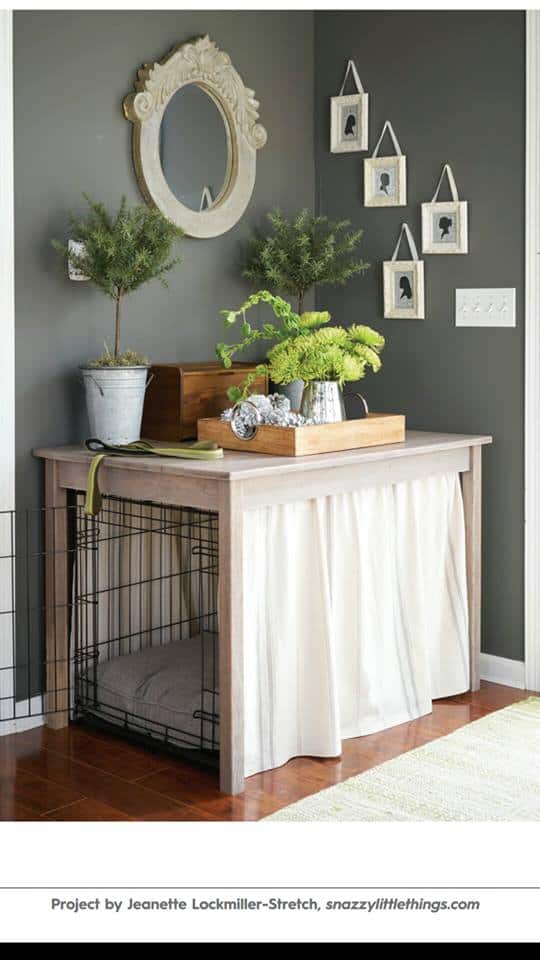
Build this beautiful dog crate table! A simple way to to beautify your dog’s corner of the house. This project was featured in Better Homes & Gardens, January 2017.
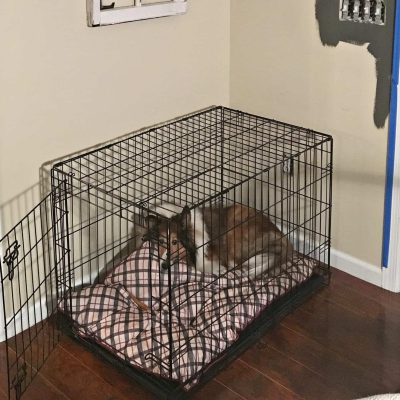
To quote my daughter, “you’re not a good puppy, but you’re a sweet puppy”. Our dog Buddy was crate trained at the time we adopted him at three years old. His family gave him up for a number of reasons.
My daughter’s assessment was so right. There was an absolute sweetness about Buddy. Anyone that met him, loved him. He was a bit of a celebrity with my kids’ friends.
A little-known fact about me: I rescued and rehomed 16 dogs (and a pregnant momcat + her babies) in 2007.
But none of those dogs were Buddy. He came with a “7 Day Free Trial” which meant he had numerous issues: separation anxiety, peeing and pooping whenever we left the house (in protest), dominance issues, excessive barking. And…he hates other dogs. He was a puppy mill puppy. And evidently…Buddy decided home was here with us.
Dog Crates and Why Some Dogs Need Them

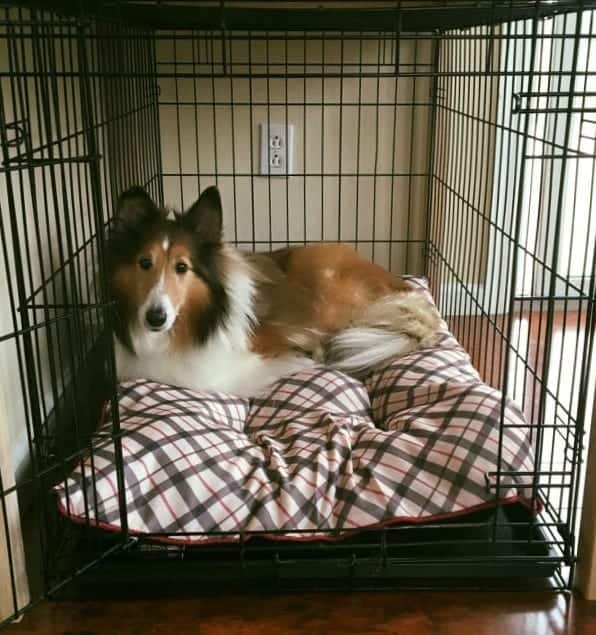
Buddy’s crate was his safe place. It’s where he would go to calm down. His issues were mostly resolved, but still had separation anxiety. Without the crate, he would have likely hurt himself as he panicked and ran all over the house when we left. Dog ownership is no joke. It comes with a lot more gear and responsibility than I ever anticipated. Dogs truly are our “kids”. So just like any kids’ room, I needed a better system when it came to storing Buddy-gear.
Dog Crate Table Building Instructions:
- Medium sized pet metal pet crate -or- pet kennel
- Two tension rods fitting up to 36″ in length
- Four 28″ table legs (prebuilt)
- Five 1″ x 4″ pine boards for the tabletop
- Cafe style curtains – any style
- Kreg Jig
- This tutorial for finishing the wood (see link for painting supplies)
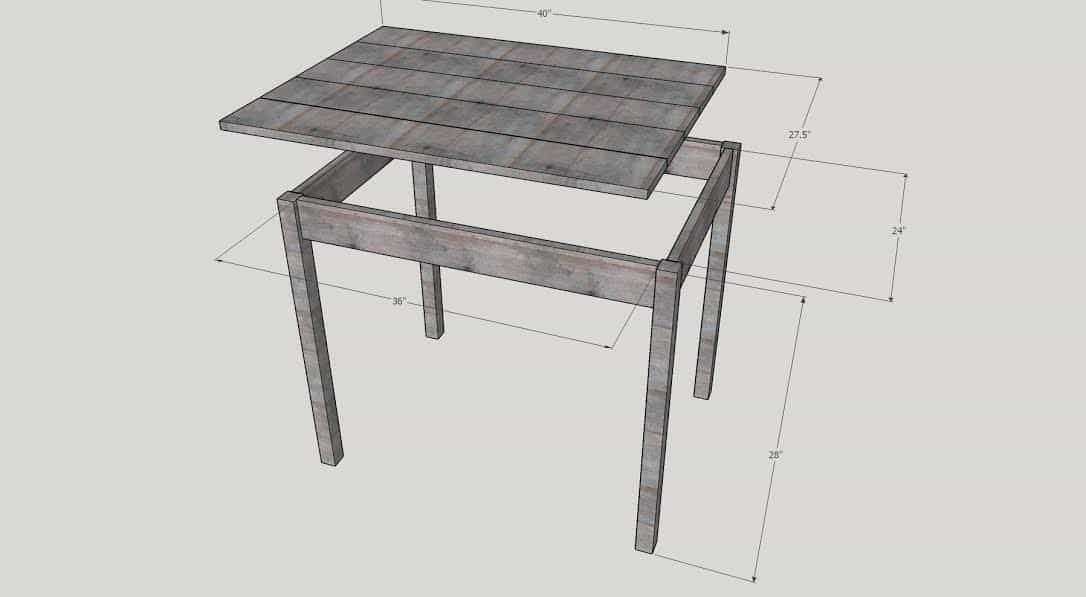
We purchased four Parson’s wood legs, 28″ long I decided on plain, Parson’s legs that you can find at Home Depot or Lowe’s.
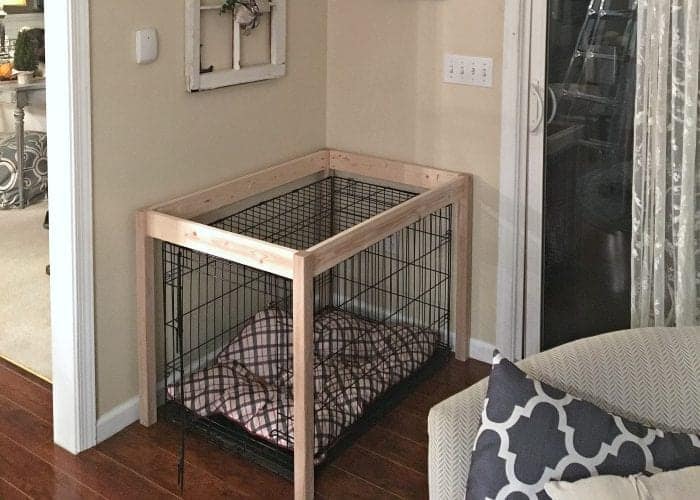
Build the Apron and Attach the Legs
Tabletop using a Kreg Jig:
For the tabletop, we used 1″ x 6″ pine boards (5 of them) and used a Kreg Jig to splice them together. I will post a more specific photo to help you see how this is done.
Stain the Table:
Then I stained the table to give it a durable driftwood finish, the same method I used on our Restoration Hardware inspired coffee table. I finished with a water based top coat.
Install Tension Rods & Hang Curtain of Your Choice:
We hung tension rods on the underside of the table, and then hung cafe curtains on the rods. I found my curtains on clearance and hemmed them using a no-sew hemming tape. He loves this setup and rests pretty peacefully in there.
FINAL REVEAL: Our New Dog Crate Table!
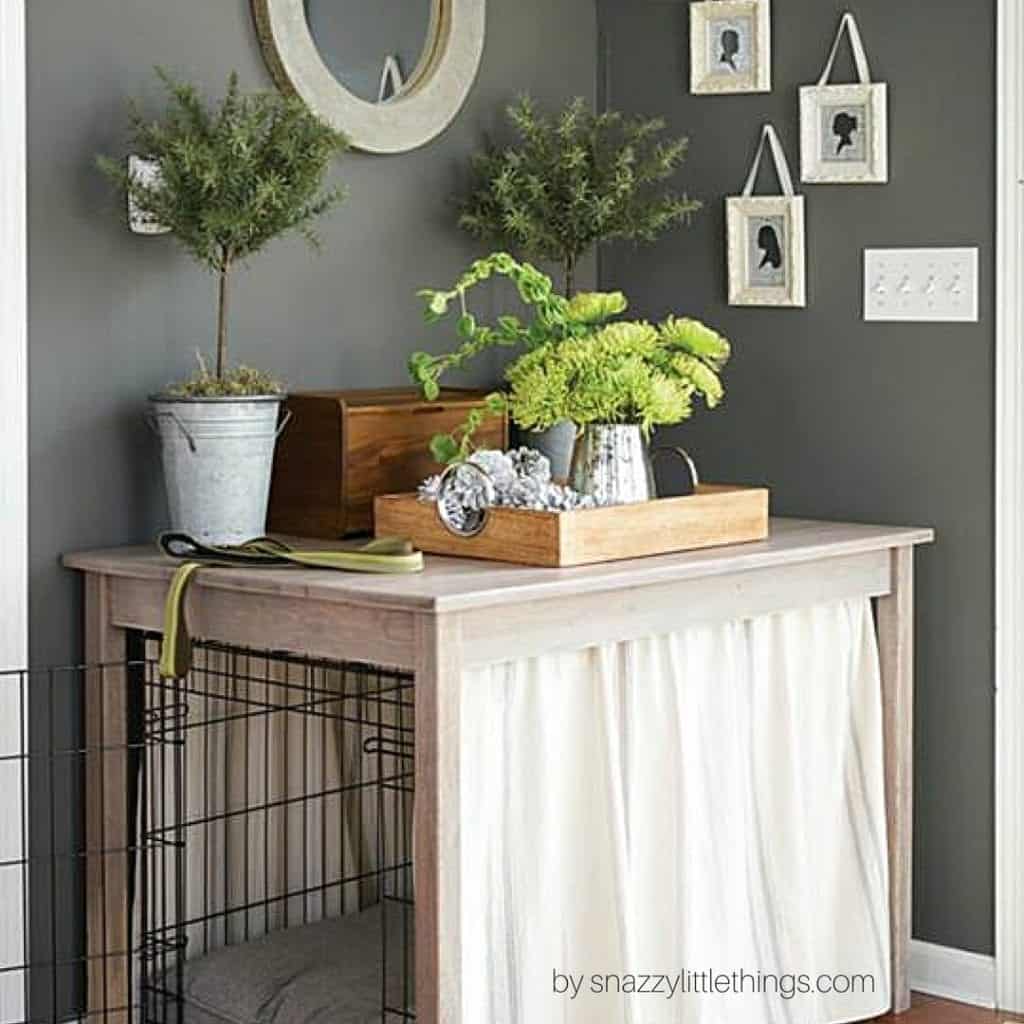
Featured in Better Homes & Gardens
January 2017 print edition
Read more about the Better Homes & Gardens article here.




What a cute sheltie – and I love what you’ve done with his crate! We also have shelties. Of the 6 my husband and I have had together, 3 have been rescues, including 2 of our 3 current furbabies, Oliver and Shelby. Oliver had many adjustment issues, but is now doing very well. Ike was an elderly sheltie who had been turned over to a kill shelter by family who said they were moving and could not take him along. We believe he was also a puppy mill dog. He had many of the same issues you describe in Buddy. I have never seen a more anxious sheltie. He was incredibly sweet, and just melted our hearts. But he was a true challenge. We only had him a year before he died suddenly of liver failure, but take comfort in knowing that it was a year in a loving home with a family who would make him a priority. I already understood the value of rescue, but it truly brought home the difference between a well bread dog from a breeder, and a puppy mill dog. Good luck to you and Buddy! I understand how challenging he must be, and applaud you for not giving up on him. I hope to hear more about how he’s doing in future blog entries!
Clair, thanks for sharing! I LOVE shelties. They are so adorable. I can’t imagine someone turning over to a kill shelter. Another thing I didn’t share, Buddy knows sign language commands….they’re so smart! I’ll keep you posted on how he’s doing, he’s 10 years old already!
Love what you have done with the crate and that Buddy has a ‘safe’ place to go. Thank you for rescuing him and giving him a loving home. I volunteer with a group and it sure pulls at your heartstrings. The world needs more people like you.
Absolutely, the rescues really did affect us! Eventually we had to give it up (because it traumatized Buddy). He’s done as much for my kids as we’ve done for him. He was therapy dog “failure” but his good qualities outweigh everything else.
This is really amazing. We have a rescue pup that has really awful separation anxiety as well and we have a crate for him but it can be an eyesore in the house! Thanks for sharing this, I’m definitely going to start this project this weekend.
Regina, I’d love to see how yours comes out. Keep me posted!
Hi, I just stumbled across this on pinterest! I am wondering what size crate you have? You listed it as being a medium crate, is that 36 inches or 42 inches? I have a puppy coming in June and I would like to build this!
This is a 36″ crate. Best of luck with your new pup!
Jeanette Your blog rocks ! Thank You for sharing Your great ideas. It`s really cool place. I pinned Your blog and shared on twitter
THANK YOU! :)
Looooove your blog and i will definetely try and build it.
I have a question though, how did you manage to calm your dog’s anxiety? I have a 10months-old cocker and barks constantly when we leave (and for the moment doesnt go in in crate)
Cheers from Belgium :)
Hi Cindy, I hear it’s just beautiful over there…I’m hoping to take the family next summer on a trip to explore Europe, can’t wait! My dog was three years old when we adopted him and was already crate trained. I consider his anxiety an ongoing problem that always needs to be managed. We tried keeping him out of the cage this week, but he’s starting to poop again in the house (in protest) of our leaving. So we’re back to the crate. My dog didn’t even chew his toys when we first got him…so getting him chew toy and treats he will actually use was one step to manage his anxiety and keeps his mind occupied. Our dog is also a herding breed and he had dominance issues. Unfortunately, that means I had to dominate him, and was very strict. He’s not allowed to bolt (aka sprint) ahead of me through doorways. He’s not allowed on our furniture (he thinks he’s equal to me eventually and starts thinking he’s dominant again). He has to work for every treat (does a few simple tricks as part of the request). He’s a LOT of work! But I’m sure you’ll get there eventually with your dog. That’s why I said “dog ownership is no joke”. It is a LOT of work, as our dog came with many issues.
THANK YOU THANK YOU THANK YOU for this post! I have been looking for something EXACTLY like this… where I can slide the kennel in and out as need be but keep it from being an eyesore! This post is verbatim what I will be following this weekend for my build. YOU ROCK!
So glad you found this helpful! We love having a useful space in the corner of this room. Let us know how your build goes and if you have any questions :)
Love this crate! Been wanting to do something like this with our dog’s crates but didn’t know how. Great tutorial. Just one question, where did you find the cafe style curtain?
Courtney, I had the ones pictured on hand (it was actually an 84″ curtain that was discontinued from Bed, Bath and Beyond). But with the height of the table most any curtain will likely need to be hemmed with the hemming tape that you can iron on. I found some pretty curtains from Homegoods recently and they were on clearance and they were cafe style. Your best bet may be Amazon for a ticking stripe style if that’s what you’re looking for. Good luck!
My wife saw this awesome project in BHG and is excited for me to give it a try. Thanks for sharing! I have one question about the table top. When looking closely at the side of the top, it appears the end grain of the 1×6 boards is covered. If that is the case, what material did you use to hide the end grain and joints?
I love this so much!! I plan on building this for our 2 year old Chocolate lab who loves his crate for bed time. I know it says medium sized dog crate, but what are the dimensions of the one shown here??
Thanks! Our dog crate is 36″ long x 30″ tall
I love what you did here! I have 2 Australian Shepherds that are both crate trained since puppyhood. They’re 10 and 9 years old. They also have to be kenneled when unsupervised because one will pee all over (he drinks like a fish and is intact) and then the other helps herself to food (she’ll open cupboards and is a bottomless pit). Oh, and my boy I’ve had tested out the wazzo and there’s nothing wrong with him other than what goes in must come out. lol But I have my kennels, one on each side of my entertainment center in the family room and they ARE an eyesore. Your kennel is about the same size as mine are, however you said your is 30″ tall. The table legs you have are 28″ tall so I’m a bit confused on how the table would give the clearance it’s providing, with the legs 2″ shorter than the kennel height. Because my boy sometimes pees himself I have to be able to remove the kennel as well. So I think I’m going to try your solution here. I’m just a bit confused. It looks like your kennel is 24″ wide, and that’s the width of your table top. So the 30″ is definitely not accidentally the width. Thank you for helping me on this!
Love your crate for your special friend. It has been so long since I have seen anyone own a Sheltie. I just love them and your is beautiful. I don’t understand why people would be upset because you are loving and caring for your pet. Pay no attention to them probably just jealous they don’t have such a gorgeous dog.
Debbie, thanks so much for your comment. Buddy is such a good boy – and I think once you put your projects out there, there will always be people who go out of their way to say negative things. I’m all too familiar with people like that and distance myself but I love all of my readers, we think alike!
Love this table! Can you tell me how you attached the tabletop to the bottom?
Love this!
Do you have the actual plans including the cut instruction? What size are the boards to which you’ve attached the legs?
Thanks in advance!
Jill,
the critical thing is that you end up with openings on both the front, sides and top that are slightly larger than your crate. Our crate was 24 X 36 X 24 so wed laid it out this way. The legs are 28″ high, we used pre made legs that I had laying around but 2X2’s will work. Our Crate is 24″ high so I made the apron 3″ thick. That leaves a 25″ height to fit the Crate. The length of the apron board on the front is 25″ and on the sides the length is 37″. This was an all Kreg Jig build attaching the Apron to the legs is incredibly simple using the Kreg Jig. I left a 1/4″ reveal on the apron.
Our top is 29 X 42. 1 X 6 boards are actually 5 1/2 inches wide you can edge join 6 of these and trim down to whatever table width you prefer.
Hopefully this helped.
Mark
Thanks Mark! I appreciate it!
Do you happen to have a source for where you purchased the pre-made table legs?
Sharon, we bought those at Home Depot. I believe if you click the photo of the legs it will take you to the exact link with the SKU number.
Love this and want to try it–have a couple of questions.
The only legs I can find have hangar bolts installed, which I can’t use if I want to put the apron correct? Did you legs not have these hangar bolts? If not, how did you attach the top? Or is it just setting on the leg assembly?
Thanks and can’t wait to get this done-its a gift for a dog loving friend.
We actually removed the hangar bolts – sorry I forgot to include this part in the tutorial. Then we used a Kreg Jig to attach the top to the legs. Make sense? If not email me directly and I can show you photos of our build.
Jeanette: Thanks very much for posting this. We adopted a sweet puppy mill Catahoula Leopard/Border Colloe mix in November. She also is a very anxious girl – attacks and barks at the TV when animals are on – never realized how many commercials have animals!!!!. She uses our bedroom closet and an area under a desk in the basement when it thunders or anything else unnerves her. She wants so much to see other animals but her excitement and loud bark scare them (and their owners)! Still workung on all if this. The project you showed her would be a great help for her!
Hello! So excited to try this project!
It looks like you have sides that connect the legs. Can you confirm the boards you used for that?
I’m also a little bit confused on how you attached the top of the table to the base!
Thank you,
Sylvia
I love what you did for the crate.
Wish I could do something like that, only one major caveat…our dog overheats without the air flow! We have to have the window open above her and nothing on top of the crate to restrict the air flow!
It started when she was a pup at 8 weeks when we brought her home….so it isn’t a health issue, just the way she is made.
She is a labrador retriever and the fourth we have had….all of them have heating issues, but she is most the extreme…
so we put up with the ugly crate…her safe spot…but wish I could do what you have done….
Nancy
What a great idea! I’m definitely showing this to my son and DIL who have a large crate in their living room. I know they’ll love this! Pinned
I’m looking to make something like this for my dog’s crate and am confused about 2 things: 1.) could you explain how the pine boards used for the top stay together (not sure I understand how they are spliced together), and 2.) how is the top attached to the base of the table.
Thinking about using the driftwood technique too!
Thank you, for your inspiration! I used to be able to do DIY projects easily but most recently not so much due to disabilities. I reached out to a couple people for a hand in this project but they were not available. Not wanting to let that deter me I started seaching for other ideas to help me get this project done affordably. I ended up buying an IKEA ingo table after taking measurements to make sure my old metal dog crate would fit under it. I stained and whitewashed it. Added the curtains on the sides of it. It turned out absolutely beautiful!
LOVE this! We have two rescues, each in this same size crate. Do you think it’s possible for us to update/double these plans, push our dog crates together and build one big one? We’ve been looking into purchasing a double dog den and they range anywhere from $2000-6000 🥴
So I’m not good with math and calculating measurements but I REALLY want to make this for my current pups; I have two crates that are 24.5”L x 18.5”W x20.5”H
Can anybody tell me what sizes of wood I’ll need to make this?! Please and thank you sooo much!
Hi Tasha, we need to update this tutorial with some new links, so I will get back to you with some ideas. This particular table build is actually a standard height table perfectly built to cover one (1) medium dog crate. Did you want 1 table to cover 2 dog crates?
Thank you! Perfect! I’m going to make this! Can I ask what is the beautiful green wall color in the BHG photo?? And what color stain?