DIY Paper Christmas Village
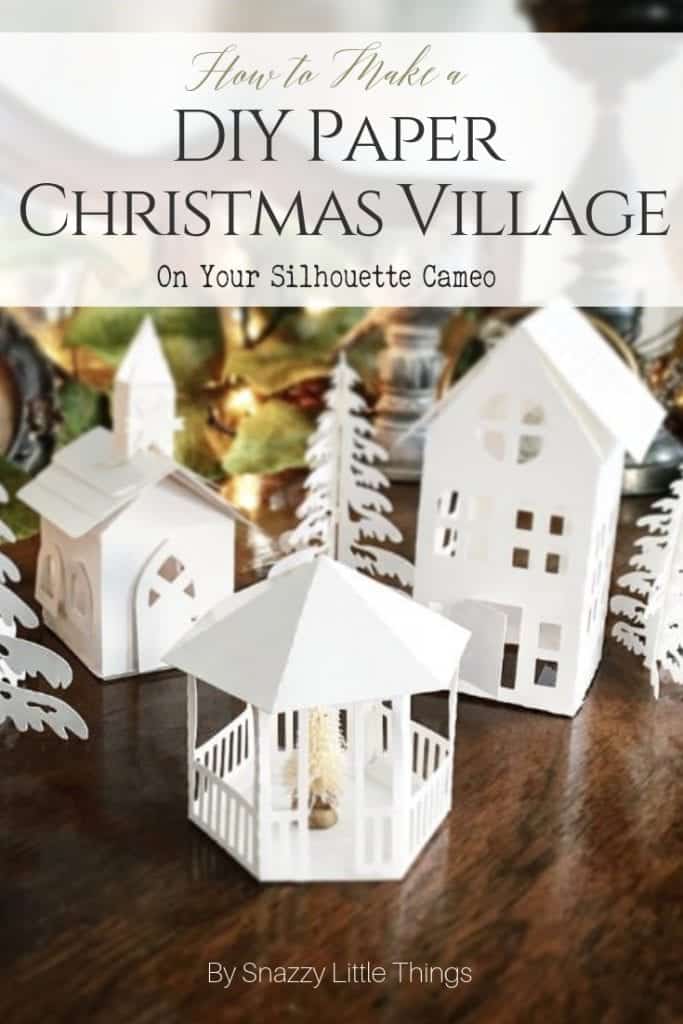
I’ve been attempting to add little “pops of white” in my holiday decor this year, and I love the white painted Christmas villages I’ve been seeing lately on Pinterest. I hear they sell little ceramic Christmas village houses at the dollar store (let me know if you see them, I’ve not been there as of yet). Some bloggers have been painting thrifted Dickens villages and they look beautiful (like this one at Blesser House , and this one from Refresh Restyle). So I was inspired to try my own version of a DIY Christmas village – Silhouette style.
DIY Christmas Village
(Using a Silhouette Cameo or Cricut)
Affiliate links included throughout this post
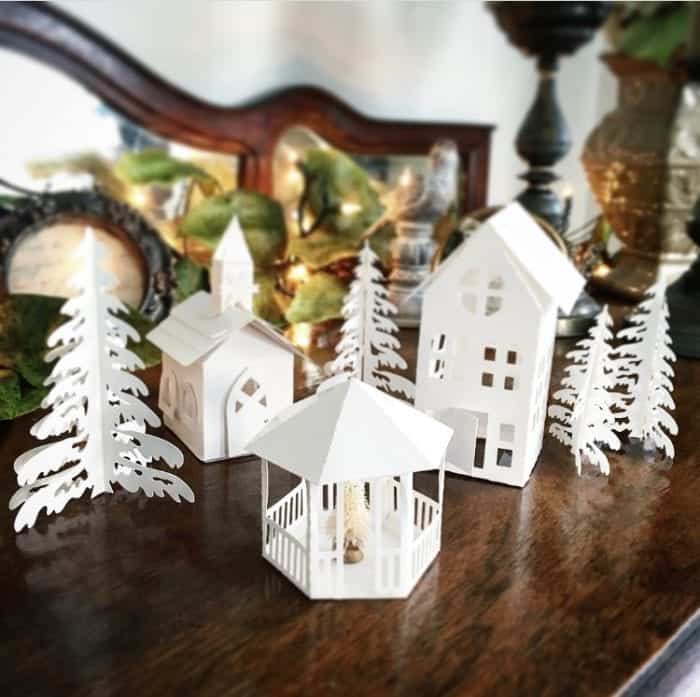
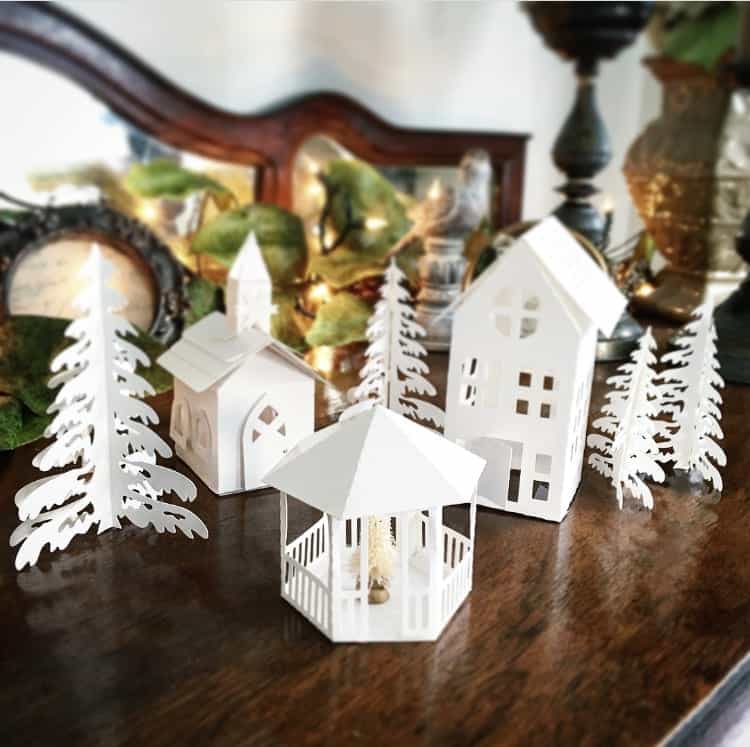
Considering I have an under-utilized Silhouette at home, I hopped onto the Silhouette Design Store and WOW! So many patterns to choose from! And perfect for a nice, fresh look to my tabletop vignettes this holiday season. I simply cut the patterns (already pre-made) and pieced them together using glue dots.
If you don’t own a Silhouette and not sure if you can afford one, I understand that. (I own this specific Silhouette bundle and this Cricut machine). I will say that the decision to purchase was based on the kind of projects I’d been doing and it simply saved me so much time. We created my logo and marketing materials for my booth and sold several farmhouse style signs, so it has more than paid for itself. I wish I would have had it during my wedding, but it’s certainly a timing thing.
So instead of a ceramic, painted Christmas village…this is the next best thing! And I love it because I purchased the license for the patterns which means I can make them again next year.

- A Silhouette Machine – or-
- Cut by hand: While you can certainly cut these patterns by hand with a lot of patience, just download a PDF pattern, print onto card stock and begin cutting.
- Buy the pattern(s) of your choice from the Silhouette Design Store
- FYI, the gazebo pattern is from 3D Cuts, and the larger church was created by designer, Lori Whitlock. You can purchased their work inside of the Silhouette Design Store and just search them by name. 3DCuts also provides instructions to assemble the tea light village.
- To login to Silhouette Cloud (free, that’s how you transfer your purchased images to your Silhouette Library)
- White Poster Board -or-
- You can use patterned scrapbook paper for more colorful designs
- Chip board if you want something more permanent that you can paint
- A 12″ x 12″ Silhouette Cameo Cut Mat
- Glue Dots – or – hot glue if you want everything to adhere perfectly and last longer
Cutting instructions:
- Buy your pattern (from Silhouette Design Studio)
- Download to your purchases to your Silhouette Library by logging into Silhouette Cloud
- Open your Silhouette Software then File–> Library to make sure your designs are there
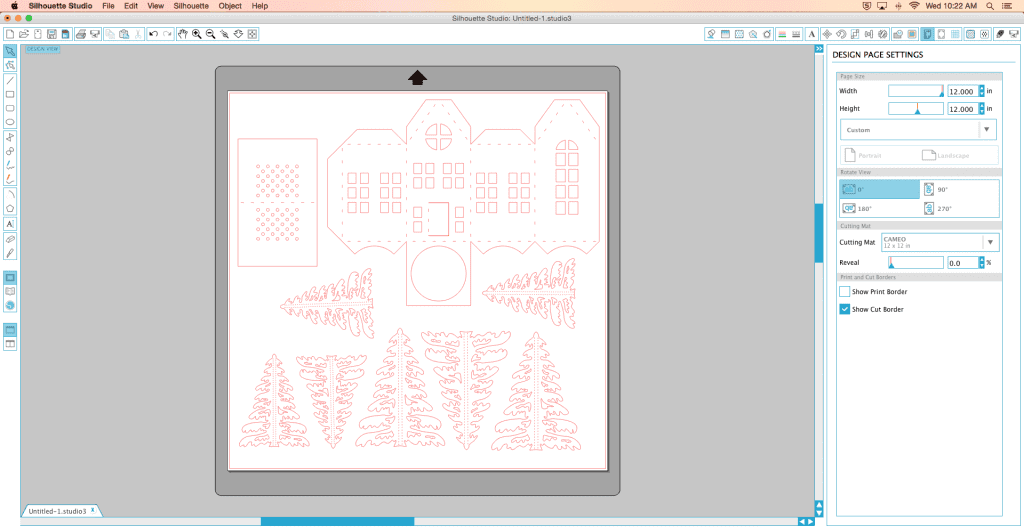
- File –> New (to open and create a 12″ x 12″ new design in Design Page Settings, see image below)
- File –> Library –> Click your new design (this is how you add it)
- Drop your designs and arrange them to fill your paper, but leaving room at the edge for cutting. Here are my settings up to this point:
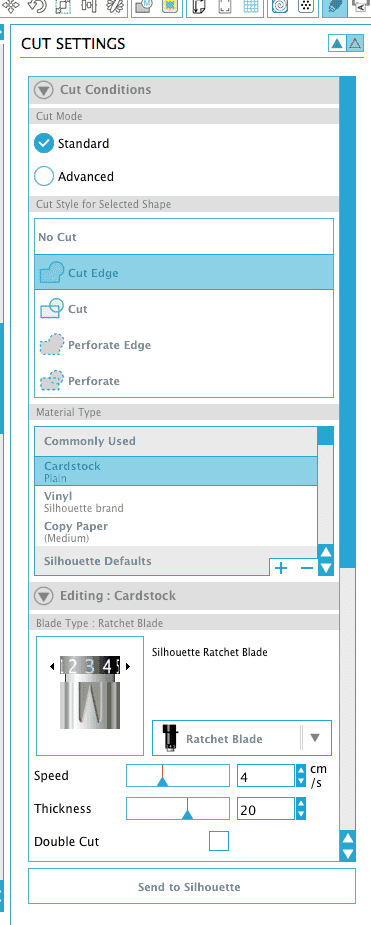
- Set the cut by clicking the cut icon (black, upper right hand corner) to:
- On the cut mat (sticky side up) place your paper on the sticky side of the cut mat.
- Line up the cut mat (paper side up, arrow first) then press “Load Cut Mat” on your Silhouette Machine. Your design is locked and ready!
- Double check settings mentioned in #6 above for cardstock (see image)
- Click “Send to Silhouette” — watch the cutting magic!
Now, make your buildings & structures:
When you remove the paper….you reveal your designs. A good cut will just lift right off. Remove the excess paper around your designs…
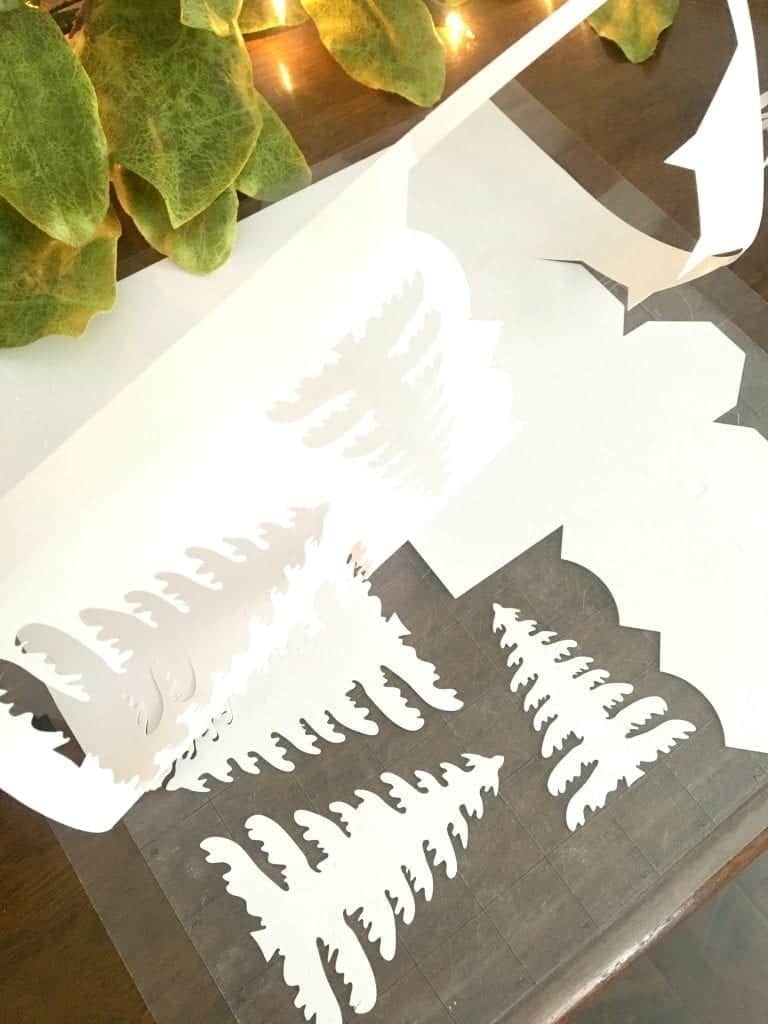
…then carefully lift your designs off of your cut mat.
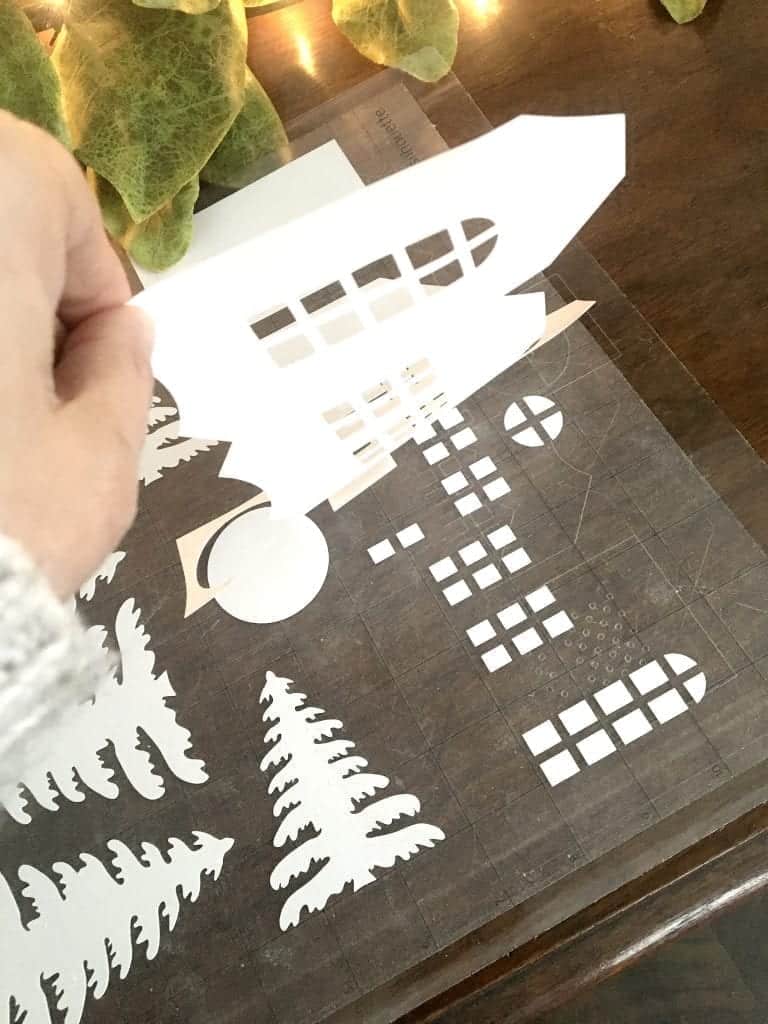
Then begin folding along the dotted lines…and you’ll see exactly how the house should come together.
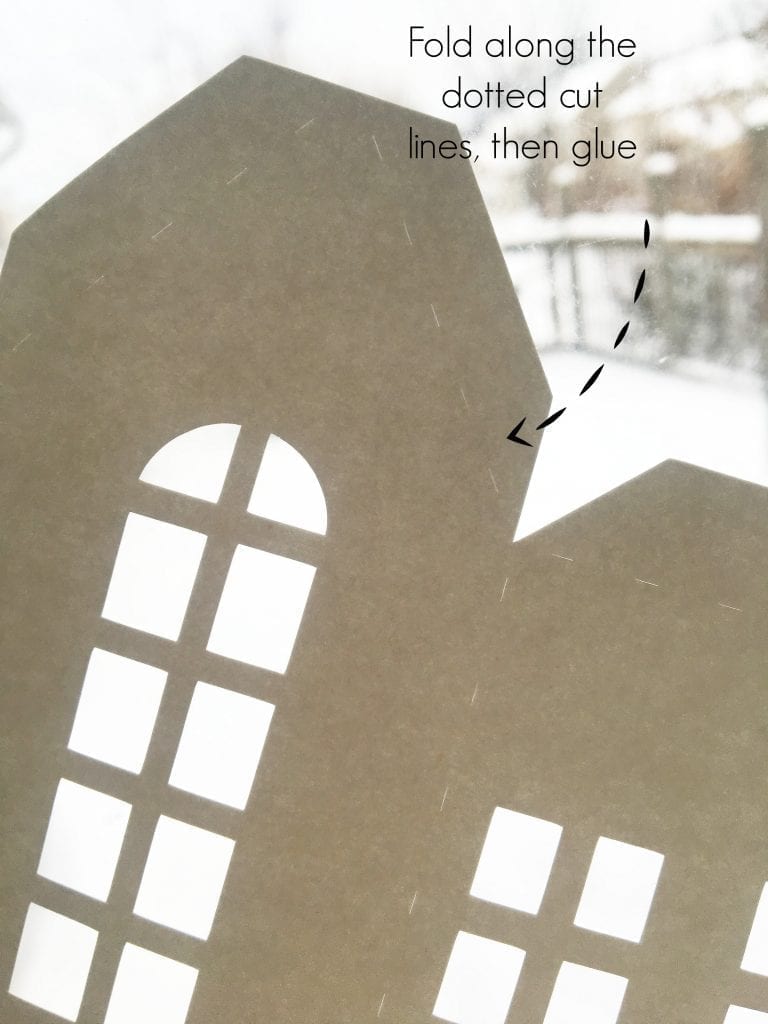
You can certainly try hot glue to secure them together, but glue dots did just the trick for a super cute, temporary vignette that’s fun to make year after year!
I’m now a Cricut ambassador and find the Cricut so much easier to work with. I can still shop in the Silhouette store and purchase SVG files and make similar designs. I fall in love with the machine the more I use it.
Happy crafting!




That silhouette village is so pretty!
Cheryl, that was my favorite too! Making the houses was so fun this year!
They look awesome! I am totally in love with small houses. Actually, I have started to craft small houses myself, but yours are so beautifully in their whiteness….
Here are mine: http://gabiralea.ro/en/from-trash-to-treasure-block-houses-made-from-wood-scraps/
WOW! I love this little village!! I don’t have a silhouette machine, but I would like to get one. Pinning this, and scheduled to share.
Silhouettes are amazing. I held out for way too long and finally bought one. We’ve made so many pretty signs using ours.
This is just the cutest Christmas display! I can see them all lit up at night with some sparkly lights!!
Thank you so much for sharing your sweet project with us over at Waste Not Wednesday!
Thanks so much!